Oregon Scientific Weather Station Instruction Manual: A Comprehensive Guide
This manual details setup, operation, and troubleshooting for your Oregon Scientific weather station, ensuring accurate data and reliable forecasts for informed decisions.
Understanding Your Oregon Scientific Weather Station
Your Oregon Scientific weather station is a sophisticated tool designed to provide hyperlocal weather data. It comprises a main console, displaying real-time conditions, and remote sensors transmitting information wirelessly. These sensors typically measure temperature, humidity, wind speed/direction, and rainfall. Understanding each component’s function is crucial for accurate readings. The console processes this data, often employing algorithms to forecast future weather patterns, offering valuable insights for daily planning and preparedness.
Model Identification and Features
Identifying your specific Oregon Scientific weather station model is key to accessing the correct support and features. Models vary significantly in sensor capabilities – some include UV/solar radiation sensors, soil temperature probes, or even lightning detectors. Common features across models include atomic time synchronization, adjustable display brightness, and customizable alerts for extreme weather conditions. Refer to the label on the console’s base or original packaging to determine your exact model number for detailed specifications.
Initial Setup and Component Checklist
Before beginning, verify all components are present: a main console, an outdoor sensor array (temperature, humidity, wind, rain), a mounting bracket, an AC adapter, and potentially batteries. Carefully unpack everything and inspect for damage. Ensure the sensor array’s rain collector is clean and unobstructed. Familiarize yourself with each component’s purpose before proceeding with installation. Retain the packaging for potential returns or warranty claims.
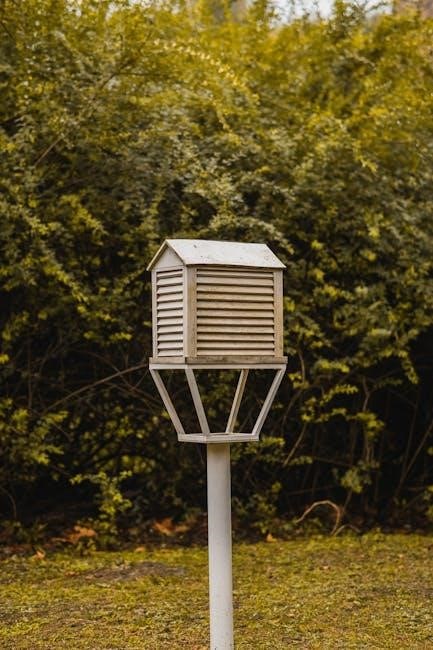
Installing the Outdoor Sensor
Securely mount the outdoor sensor array using the provided bracket, ensuring it’s level and stable. Avoid obstructions like trees or buildings that could affect readings. The sensor transmits wirelessly to the console, so proximity isn’t critical, but keep it within range. Double-check all screws are tightened to prevent movement from wind. Proper installation is vital for accurate weather data collection.
Mounting Location Considerations
Choose an open location for the outdoor sensor, away from heat sources or reflective surfaces. Avoid areas near buildings or trees that might obstruct wind flow or rainfall. Ensure the sensor is at least 5 feet off the ground for accurate readings. Consider prevailing wind direction when positioning the anemometer. Proper placement maximizes data accuracy and reliability of your weather station.
Wireless Transmission Range and Interference
The Oregon Scientific weather station utilizes wireless technology with a typical range of up to 330 feet in open areas. However, walls, floors, and electronic devices can cause interference, reducing this range. Minimize obstructions between the sensor and console. Avoid placing near microwaves, Wi-Fi routers, or other wireless transmitters for optimal signal strength and reliable data transmission.
Setting Up the Main Console

Position the main console in a central indoor location, away from direct sunlight and heat sources. Ensure it’s easily accessible for viewing and button operation. Before powering on, verify all components are present. Connect the AC adapter to a power outlet, or insert batteries according to the polarity markings. The console will initiate a self-test upon startup, preparing to receive data from the outdoor sensor.

Powering the Console (Batteries & AC Adapter)
The console operates via AC adapter or batteries (typically AA). Using both simultaneously isn’t recommended. If using batteries, install them correctly, matching polarity (+/-) as indicated. The AC adapter provides a stable power source; ensure it’s securely connected. Low battery indicators will appear on the display, prompting replacement. Battery life varies based on usage and temperature.
Initial Time and Date Configuration
Upon initial setup, accurately configuring the time and date is crucial for correct data logging and forecasts. Use the ‘Set’ or ‘Mode’ button to access the settings menu. Navigate using the ‘Up’ and ‘Down’ arrows to adjust the year, month, day, hour, and minute. Confirm each selection to save. Ensure 12/24 hour format is correct.
Understanding the Display Icons
The main console utilizes various icons to convey weather information at a glance. A sun icon indicates clear skies, clouds signify overcast conditions, and raindrops denote precipitation. Snowflake icons represent snow, while lightning indicates thunderstorm activity. Battery icons show console power levels. Familiarize yourself with each icon’s meaning for quick weather assessments.
Temperature Units (Celsius/Fahrenheit)
Your Oregon Scientific weather station allows you to display temperatures in either Celsius (°C) or Fahrenheit (°F). To switch between units, locate the “UNIT” or “°C/°F” button on the console. Pressing this button toggles the display. Ensure consistent unit selection for accurate data logging and comparison. Remember this setting applies to both indoor and outdoor temperature readings.
Humidity Display and Interpretation
The humidity reading on your Oregon Scientific weather station indicates the amount of moisture in the air, expressed as a percentage. Higher percentages signify greater moisture content. Generally, 40-60% humidity is considered comfortable. Low humidity can cause dryness, while high humidity can feel sticky. Monitor humidity levels for optimal indoor comfort and potential weather changes.
Measuring Wind Speed and Direction
Your Oregon Scientific weather station’s wind sensor measures wind speed in miles per hour (MPH), kilometers per hour (km/h), or knots. Wind direction is indicated in degrees or cardinal directions (North, South, East, West). Accurate placement is crucial; avoid obstructions. Consistent readings help track weather patterns and potential storm systems, providing valuable localized meteorological data.
Calibrating the Wind Sensor
To ensure accurate wind readings, occasional calibration may be necessary. Access the calibration menu on your console, typically within the settings. Compare your station’s readings to a known reliable source – a local airport or weather station. Adjust the wind speed multiplier until readings align. Regular calibration compensates for wear and tear, maintaining precision and reliable weather monitoring.
Understanding Beaufort Scale Correlation
Your Oregon Scientific station displays wind speed, often correlating with the Beaufort Scale. This scale ranges from 0 (calm) to 12 (hurricane force). Understanding this correlation allows you to interpret wind conditions – a reading of 6 corresponds to a strong breeze, capable of large branch movement. Refer to the included chart for a quick visual guide to Beaufort Scale descriptions and associated wind speeds.
Rainfall Measurement and Calibration
The Oregon Scientific weather station accurately measures rainfall using a tipping bucket rain collector. Each full tip represents a specific amount of rainfall (typically 0.2mm or 0.01 inch). Regularly empty the rain collector to ensure accurate readings, especially after heavy precipitation. Calibration may be needed; compare readings with a manual gauge and adjust settings if discrepancies occur.
Emptying the Rain Collector
Regularly emptying the rain collector is crucial for accurate rainfall measurements. Debris like leaves and insects can obstruct the tipping bucket mechanism, leading to underreporting. Empty the collector after each significant rainfall event, or at least weekly. Gently remove any obstructions and ensure the bucket moves freely. Consistent maintenance guarantees reliable data for your Oregon Scientific weather station.
Units of Measurement (mm/inch)
Your Oregon Scientific weather station allows you to display rainfall in either millimeters (mm) or inches (inch). Access the settings menu on the main console to toggle between these units. Selecting the appropriate unit ensures accurate interpretation of rainfall data for your region. Remember 1 inch equals 25.4 mm. Choose the unit you prefer for convenient and understandable weather monitoring.
Barometric Pressure Readings
The Oregon Scientific weather station measures atmospheric pressure, crucial for predicting weather changes. Readings are displayed in hectopascals (hPa) or inches of mercury (inHg). Falling pressure often indicates approaching storms, while rising pressure suggests improving conditions. Understanding these changes helps anticipate weather fronts. Regularly observe pressure trends alongside other data for a comprehensive forecast.
Understanding Weather Fronts and Pressure Changes
Your Oregon Scientific station’s barometric pressure readings correlate directly with approaching weather fronts. A rapid pressure drop signals a fast-moving cold front, often bringing showers and wind. Slower declines indicate warm fronts, typically resulting in prolonged, gentler precipitation. Rising pressure post-front passage signifies clearing skies. Combine pressure data with temperature and humidity for accurate predictions.

Calibration and Accuracy
Maintaining accuracy requires periodic calibration of your Oregon Scientific weather station. Compare readings to a trusted source – a local airport or national weather service. Wind speed and rainfall sensors may drift over time, necessitating adjustments via the console’s settings menu. Temperature and humidity sensors generally require less frequent calibration, but monitoring is crucial for reliable data.
Forecasting Features and Alerts
Your Oregon Scientific weather station utilizes a sophisticated algorithm to predict future conditions based on barometric pressure changes and historical data. Configure high and low temperature alerts to receive notifications when thresholds are exceeded. Severe weather alerts, if supported by your model, provide warnings for potentially hazardous conditions. Customize alert settings through the console’s menu for personalized notifications and proactive preparedness.
Understanding the Forecasting Algorithm
The forecasting algorithm analyzes atmospheric pressure trends, temperature fluctuations, and humidity levels to predict short-term weather changes. A falling barometric pressure often indicates approaching low-pressure systems and potential stormy weather. Rising pressure suggests improving conditions. The station learns from past data, refining its predictions over time for increased accuracy. Consider local geography when interpreting forecasts.
Setting Up High/Low Alerts
To configure high/low alerts, access the settings menu on your main console. You can set thresholds for temperature, humidity, and barometric pressure. When a measured value exceeds or falls below your set point, an audible alarm and visual indicator will activate. Customize alert sensitivity to avoid false alarms based on typical local weather patterns. This feature provides proactive weather awareness.
Data Logging and Memory Functions
Your Oregon Scientific weather station automatically records historical weather data, storing readings for temperature, humidity, rainfall, and barometric pressure. Access this data through the console’s memory function, allowing you to review past conditions. The storage capacity varies by model, typically spanning weeks or months. Analyze trends and gain insights into your local microclimate using this valuable feature.
Accessing Historical Data
To view stored data, navigate the console’s menu using the ‘Recall’ or ‘History’ button. Select the desired data type – temperature, humidity, rainfall, or pressure – and time frame. The console displays readings from previous hours, days, or even months, depending on your model’s memory capacity. Review maximum and minimum values recorded during each period for comprehensive analysis.
Data Transfer Options (if applicable)
Some Oregon Scientific models offer data transfer via USB connection to a computer. Dedicated software allows downloading historical data for detailed analysis and graphing. Alternatively, certain stations support wireless data upload to online platforms for remote monitoring and sharing. Check your specific model’s specifications to determine available connectivity options and compatible software requirements for seamless data management.
Troubleshooting Common Issues
If the outdoor sensor isn’t reporting, check battery levels and sensor placement. Display errors often indicate low batteries or interference; try relocating the console. Ensure proper synchronization between the console and sensor. For inaccurate readings, calibrate sensors following the manual’s instructions. If problems persist, consult the FAQ section or Oregon Scientific support for further assistance.
Sensor Not Reporting Data
If your outdoor sensor fails to transmit data, first verify battery functionality with fresh replacements. Check the distance between the sensor and console; excessive range causes signal loss. Look for potential interference from other wireless devices or obstructions. Resynchronize the sensor and console following the manual’s pairing instructions. Confirm the sensor ID is correctly set within the console’s settings.
Display Errors and Solutions
Encountering display errors? First, attempt a console reset by removing batteries or the AC adapter for several minutes. Check for low battery indicators, as this often causes erratic readings. If segments are missing, ensure proper contrast adjustment. For frozen displays, a reset is usually effective. Consult the manual’s error code section for specific troubleshooting steps related to unique error messages displayed on the screen.
Battery Replacement and Maintenance
Regular battery checks are crucial for accurate readings. Use only the recommended battery types (typically AA or AAA alkaline) to avoid damage. Replace all batteries in the console and outdoor sensor simultaneously for consistent performance. Avoid mixing old and new batteries. Clean battery contacts with a dry cloth if corrosion appears. Remove batteries during prolonged storage to prevent leakage and potential damage to the unit.
Recommended Battery Types
For optimal performance, your Oregon Scientific weather station requires specific battery types. The main console generally uses AA alkaline batteries, while the outdoor sensor often utilizes AAA alkaline batteries. Lithium batteries are not recommended as they may cause inaccurate readings. Always check your specific model’s documentation for confirmation. Using the correct batteries ensures longevity and reliable data transmission.
Cleaning and Care Instructions
To maintain accuracy and prolong the life of your Oregon Scientific weather station, regular cleaning is essential. Use a soft, damp cloth to wipe down the console and sensor. Avoid harsh chemicals or abrasive cleaners. Periodically clear debris from the rain collector. Ensure ventilation openings are free from dust. Proper care ensures reliable performance and accurate weather data collection.
Advanced Settings and Customization
Explore advanced options for a tailored experience with your Oregon Scientific weather station. Adjust sensor IDs to accommodate multiple sensors. Customize display brightness and contrast for optimal viewing. Configure data logging intervals to suit your needs. Fine-tune alert thresholds for specific weather conditions. These settings allow personalized monitoring and detailed weather analysis.
Adjusting Sensor IDs
Proper sensor ID assignment is crucial for accurate data readings. Access the settings menu on your console and navigate to the sensor ID configuration. Each outdoor sensor requires a unique ID. Follow the on-screen prompts to assign or change IDs. Ensure no duplication occurs, as this will cause incorrect data association. Verify settings after adjustment.
Display Brightness and Contrast
Optimize your viewing experience by adjusting the display settings. Within the console’s menu, locate the brightness and contrast controls. Use the navigation buttons to increase or decrease these levels until the display is clear and comfortable for your environment. Experiment with different settings for optimal readability, considering ambient lighting conditions. Save changes when satisfied.

Frequently Asked Questions (FAQ)
Here are answers to common user inquiries. Why isn’t my sensor connecting? Ensure proper battery levels and proximity to the console. Display inaccurate? Recalibrate sensors following the instructions. Experiencing interference? Relocate the console away from electronic devices. For detailed troubleshooting, consult the full manual or Oregon Scientific’s support website for further assistance.
Wireless Connectivity Issues
Troubleshooting wireless signal problems is crucial for accurate readings. Interference from other devices (routers, microwaves) can disrupt transmission. Ensure the console and outdoor sensor are within range. Check battery levels in both units, as low power weakens the signal. Try repositioning the sensor or console. Adjust sensor IDs if multiple stations are nearby.

Accuracy Concerns
Achieving optimal accuracy requires proper setup and calibration. Compare readings with a trusted source (local weather station) and calibrate accordingly. Ensure the outdoor sensor isn’t exposed to direct sunlight or heat sources. Wind speed/direction sensors need unobstructed exposure. Rainfall collectors must be level. Remember, consumer-grade stations offer estimates, not professional-level precision.
Warranty Information and Support
Oregon Scientific provides a limited one-year warranty against manufacturing defects. Retain your proof of purchase for warranty claims. For support, visit the Oregon Scientific website for FAQs, troubleshooting guides, and contact information. Direct support options include email and phone assistance. Warranty claims require returning the product with authorized documentation.

Contacting Oregon Scientific Support
For assistance, visit the official Oregon Scientific website and navigate to the ‘Support’ section. Here you’ll find frequently asked questions and troubleshooting resources. You can also submit a support request online or locate contact details for phone and email support. Be prepared to provide your model number and purchase date for efficient assistance.

Warranty Claim Procedures
To initiate a warranty claim, retain your original proof of purchase and contact Oregon Scientific support. Clearly describe the defect and provide your product’s model number. You may be asked to ship the product for inspection; Warranty coverage excludes damage from misuse, accidents, or unauthorized modifications. Review the full warranty terms online before submitting your claim.
Safety Precautions and Warnings
Always prioritize safety when installing and maintaining your weather station. Avoid mounting the outdoor sensor near power lines. Do not disassemble the console beyond the battery compartment. Keep small parts away from children. Discontinue use if any component shows signs of damage. Follow all local electrical codes when using the AC adapter.
Electrical Safety
To ensure electrical safety, only use the provided AC adapter or batteries specified in this manual. Never expose the console or adapter to water or excessive moisture. Do not attempt to repair the adapter yourself; contact qualified personnel for assistance. Ensure the power outlet is easily accessible and avoid overloading circuits. Disconnect the adapter during prolonged non-use.
Environmental Considerations
Dispose of used batteries responsibly, following local regulations for electronic waste; Do not incinerate batteries. The packaging materials are recyclable; please utilize appropriate recycling facilities. Consider the environmental impact when choosing a mounting location for the outdoor sensor, minimizing disturbance to local ecosystems. Protect the device from extreme weather to prolong its lifespan.
