Dental Instruments: A Pocket Guide ⎼ Article Plan
This comprehensive guide details essential dental instruments, offering a quick reference for students and professionals. It covers hand, rotary, and restorative tools,
along with sterilization protocols and easy identification techniques.
Dental instruments are specialized tools utilized by dental professionals to provide oral healthcare. Their effective use is paramount for accurate diagnoses, successful treatments, and ultimately, patient well-being. This pocket guide serves as an introductory resource, aiming to familiarize users with the diverse array of instruments encountered in a dental practice.
The world of dental instruments is vast, ranging from simple examination tools to sophisticated, high-speed rotary devices. Understanding the purpose, proper handling, and maintenance of each instrument is crucial. This guide will navigate through classifications, focusing on hand instruments, cutting & carving tools, and restorative aids.
Furthermore, we’ll explore the importance of sterilization and maintenance, ensuring instrument longevity and preventing cross-contamination. A quick reference section will consolidate key information for chairside accessibility. Whether you are a dental student, assistant, or practicing dentist, this resource aims to enhance your knowledge and proficiency in utilizing these essential tools. The compact format is designed for easy portability and study, making it an invaluable companion in both clinical and academic settings.
II. Classification of Dental Instruments
Dental instruments can be broadly classified based on their primary function and method of activation. This categorization provides a systematic approach to understanding their diverse applications within a dental practice. The primary divisions include hand instruments, powered instruments (rotary), and those used for indirect procedures like impression taking.
Hand instruments, requiring manual dexterity, encompass examination tools like mouth mirrors and explorers, as well as cutting and carving instruments such as scalers and curettes. Rotary instruments, driven by air or electric handpieces, include burs and various attachments used for cavity preparation, polishing, and finishing procedures.
Further sub-classification exists within each category. For example, scalers are differentiated by their design – universal versus specific – impacting their access to various tooth surfaces. Burs are categorized by shape, size, and cutting efficiency. Understanding these nuances is vital for selecting the appropriate instrument for each clinical scenario. This guide provides a quick reference to these distinctions, aiding in easy identification and appropriate utilization of each tool, ultimately contributing to effective and precise dental treatment.
III. Hand Instruments
Hand instruments represent the foundational tools in dentistry, relying entirely on the clinician’s manual skill and precision. These instruments are crucial for a wide range of procedures, from initial examinations to intricate restorative work. They are characterized by their direct control and tactile feedback, allowing for delicate manipulation within the oral cavity.
This category encompasses instruments designed for tooth preparation, caries removal, and shaping restorative materials. Scalers and curettes, essential for periodontal treatment, effectively remove calculus and smooth root surfaces. Explorers are vital for detecting caries and assessing tooth morphology. The selection of appropriate hand instruments is paramount, considering factors like blade design, angulation, and working end configuration.
Proper technique and maintenance are critical for maximizing the effectiveness and longevity of these tools. A quick reference to instrument grips and angulation techniques is essential for dental professionals. This guide emphasizes the importance of understanding each instrument’s specific purpose, ensuring easy and accurate application during clinical procedures, ultimately leading to optimal patient care.
IV. Examination Instruments
Examination instruments are the first line of defense in comprehensive dental care, enabling clinicians to gather crucial diagnostic information. These tools facilitate a thorough assessment of the oral cavity, identifying potential issues before they escalate. Accurate diagnosis relies heavily on the skillful use of these instruments, forming the basis for effective treatment planning.
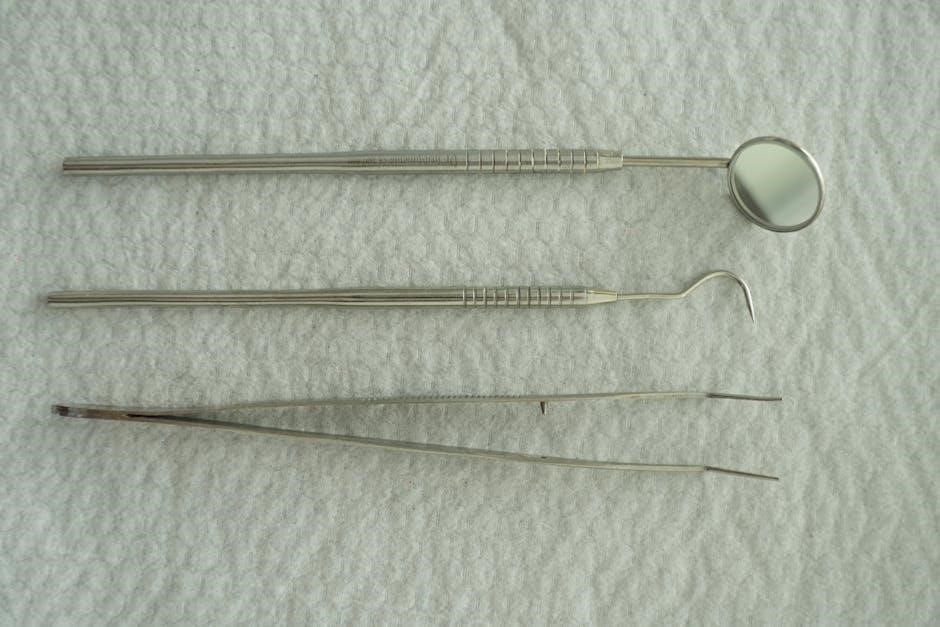
Key instruments in this category include the mouth mirror, explorer, and periodontal probe. The mouth mirror provides indirect visualization of otherwise inaccessible areas, while the explorer detects caries and irregularities on tooth surfaces. The periodontal probe measures pocket depths, assessing the health of the supporting tissues. Mastering the proper technique for each instrument is vital for obtaining reliable and consistent readings.
This guide offers a quick reference for understanding the function and application of each examination instrument, promoting easy and accurate data collection. Proper illumination and a systematic approach are essential for a comprehensive examination, ensuring no area is overlooked. These initial findings dictate subsequent treatment decisions and contribute significantly to patient well-being.
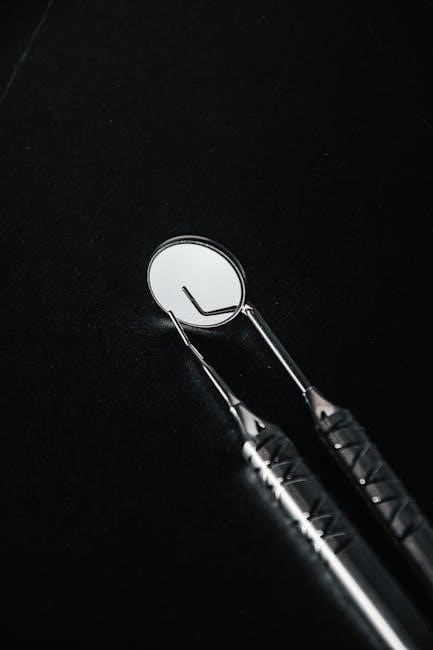
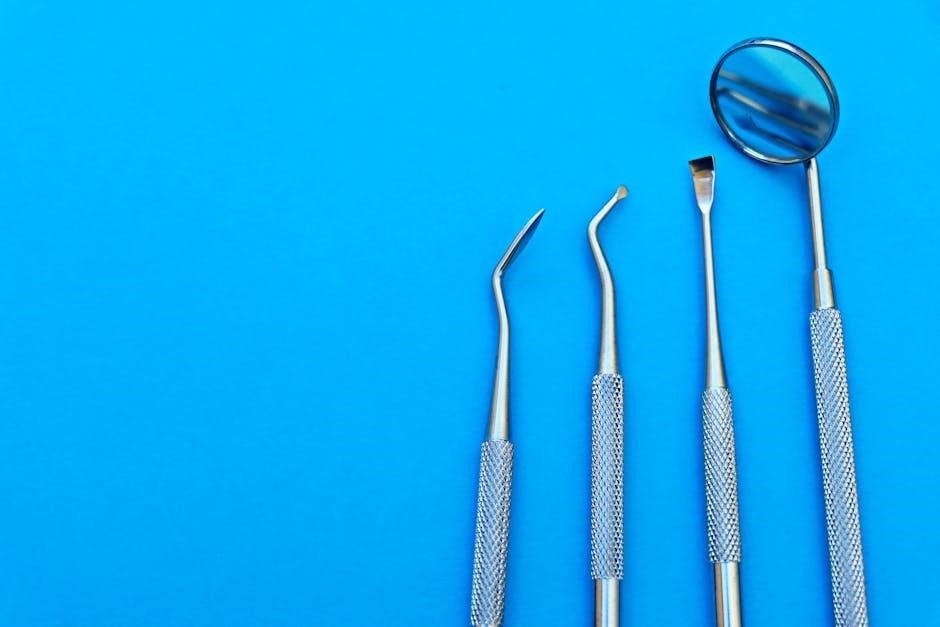
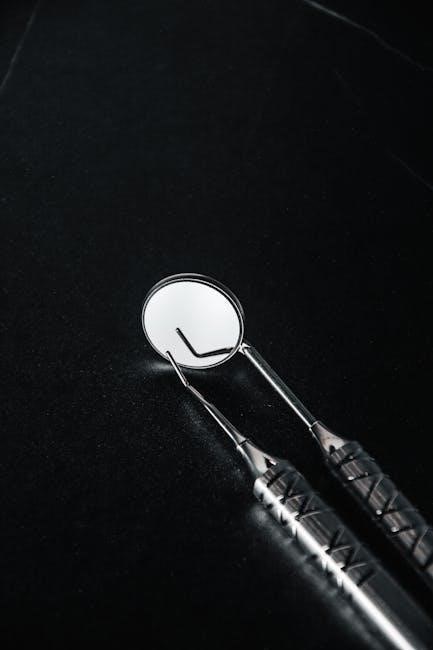
V. Mouth Mirror
The mouth mirror is a fundamental examination instrument, serving as an extension of the clinician’s eye. Its primary function is to reflect light into areas of the mouth that are difficult to directly visualize, such as posterior teeth and lingual surfaces. This indirect vision is crucial for a comprehensive oral examination, allowing for the detection of caries, inflammation, and other abnormalities.
Mouth mirrors typically feature a circular reflective surface mounted on a metal handle. They come in various sizes and shapes – round, oval, and rectangular – to accommodate different clinical needs and access. Proper angulation and positioning are key to maximizing its effectiveness, requiring practice and precision.
Beyond illumination, the mouth mirror also aids in tissue retraction, providing a clearer view of the operative field. It’s a versatile tool, essential for both diagnostic procedures and restorative dentistry. This guide provides a quick reference for selecting the appropriate mirror and mastering its technique for easy and effective use.
VI. Explorer
The dental explorer is a vital instrument for caries detection and assessing the texture of tooth surfaces. It’s designed with a pointed tip, allowing the clinician to tactfully probe for soft spots or irregularities indicative of decay. Unlike visual examination alone, the explorer provides tactile feedback, confirming the presence and extent of lesions.
Explorers come in various shapes – sickle, ball, and twig – each suited for specific areas of the mouth. The sickle explorer is commonly used for proximal surfaces, while the ball explorer is ideal for occlusal surfaces. Proper technique involves applying gentle pressure and systematically sweeping the instrument across the tooth.
However, it’s crucial to use explorers cautiously, as excessive force can inadvertently damage healthy enamel. This guide emphasizes the importance of a light touch and a thorough understanding of tooth anatomy. Mastering explorer use is fundamental for accurate diagnosis and treatment planning, offering a quick reference for easy identification of potential problems.
VII. Periodontal Probe
The periodontal probe is an indispensable instrument for evaluating the health of the supporting tissues around teeth. It’s used to measure the depth of periodontal pockets – the space between the tooth and the gum line – indicating the extent of periodontal disease. Accurate measurements are crucial for diagnosis and monitoring treatment progress.
Probes typically have markings in millimeters, allowing for precise readings. The technique involves gently inserting the probe into the sulcus (the space between the tooth and gum) and assessing the depth. Bleeding upon probing and attachment loss are also noted, providing further insights into the patient’s periodontal status.
Different probe designs exist, including Williams, Marquis, and UNC-15 probes, each with unique features. This guide highlights the importance of standardized probing techniques for reliable results. A thorough periodontal examination, utilizing the probe effectively, is a quick reference for easy assessment of gum health and early detection of disease.
VIII. Cutting & Carving Instruments
Cutting & carving instruments are essential for tooth preparation, caries removal, and shaping restorative materials. This category encompasses scalers, curettes, and burs, each designed for specific tasks. Mastering their use requires precision and understanding of tooth structure.
Scalers are primarily used for removing calculus (tartar) from tooth surfaces, while curettes excel at removing softened decay and shaping cavity preparations. The choice between universal and specific curettes depends on the tooth surface being treated – anterior or posterior. Burs, available in various shapes and sizes, are utilized with high-speed and low-speed handpieces for efficient cutting and carving.
This guide emphasizes the importance of selecting the appropriate instrument for each procedure. Proper angulation and pressure are key to achieving desired results while minimizing trauma to the tooth. A quick reference to instrument design and function ensures easy application and optimal patient care.
IX. Scalers
Scalers are specifically designed for the removal of supragingival and subgingival calculus, commonly known as tartar, from tooth surfaces. These instruments feature a pointed tip and sharp cutting edges, enabling effective debridement; They are categorized into universal and area-specific scalers, each suited for different tooth anatomy and access points.
Universal scalers possess two cutting edges and can be used on multiple surfaces, while area-specific scalers are designed for anterior teeth, posterior teeth, or universal applications with modified designs. Proper technique involves a pull stroke, angling the scaler to effectively disrupt and remove the calculus deposits.
This guide highlights the importance of selecting the correct scaler based on the location and extent of calculus. Maintaining a sharp cutting edge is crucial for efficiency and minimizing patient discomfort. A quick reference chart detailing scaler types and their applications ensures easy identification and appropriate use during scaling procedures.
X. Curettes (Universal & Specific)
Curettes are versatile hand instruments utilized for subgingival scaling and root planing, effectively removing calculus and smoothing root surfaces to promote periodontal health. Unlike scalers, curettes feature a rounded toe and cutting edges along a curved blade, allowing adaptation to the complex contours of the root surface.
Two primary types exist: universal and area-specific curettes. Universal curettes have a triangular cross-section and can be used on all tooth surfaces, while area-specific curettes (Gracey curettes) are designed for specific anatomical areas – anterior or posterior – with offset blades for improved access.
This guide emphasizes the importance of proper angulation and adaptation when using curettes. A series of short, overlapping strokes are employed to remove calculus and create a smooth, clean root surface. Recognizing the differences between universal and specific curettes is vital for efficient and effective periodontal therapy. A quick reference assists in easy instrument selection.
XI. Burs – Types & Uses
Dental burs are rotating cutting instruments crucial for a wide range of procedures, from cavity preparation and crown preparation to finishing and polishing restorations. They come in diverse shapes, sizes, and materials, each designed for specific applications. Understanding these variations is key for effective treatment.
Burs are categorized by their cutting edges – smooth, feathered, or multi-faceted – and their shape, including round, pear-shaped, tapered, and cylindrical. Carbide burs are exceptionally hard and durable, ideal for cutting enamel and amalgam, while diamond burs are used for all tooth structures and porcelain. Steel burs are generally reserved for finishing metal restorations.
This guide highlights the importance of selecting the appropriate bur based on the tooth structure and procedure. High-speed handpieces utilize friction grip burs, while low-speed handpieces accommodate straight shank burs. Proper bur selection and technique ensure efficient material removal and minimize trauma. A quick reference aids in easy identification and use.
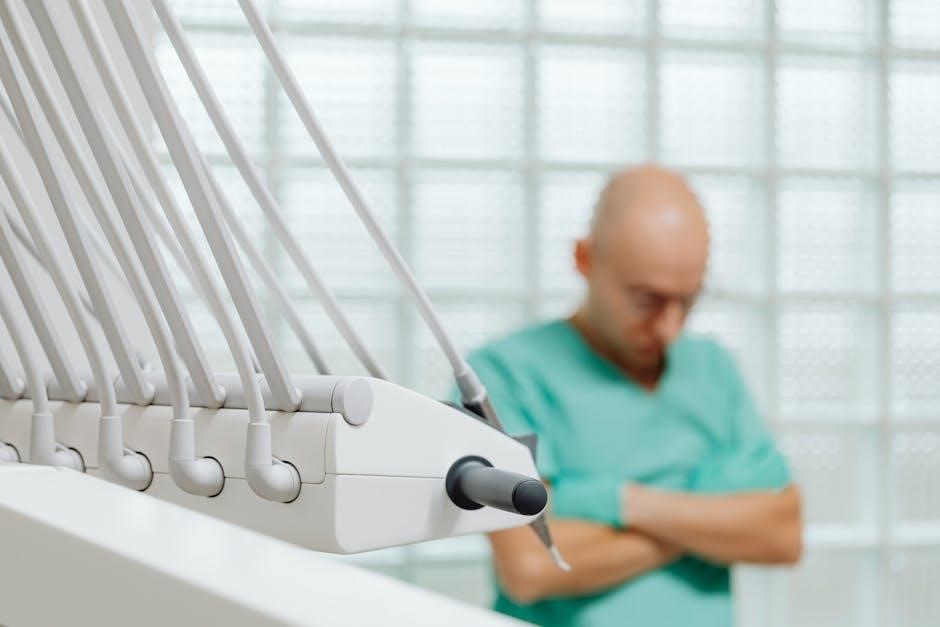
XII. Rotary Instruments
Rotary instruments represent a cornerstone of modern dentistry, significantly enhancing efficiency and precision in various procedures. These tools, powered by either electricity or compressed air, utilize a rotating action to cut, polish, or shape tooth structure and restorative materials. Mastering their use is fundamental for dental professionals.
The two primary types are high-speed and low-speed handpieces. High-speed handpieces, operating at 300,000 to 450,000 RPM, are primarily used for crown preparation, cavity preparation, and removing decay. Low-speed handpieces, with speeds under 50,000 RPM, are employed for polishing, finishing, and applying restorative materials.
This guide emphasizes the importance of understanding the different attachments available for low-speed handpieces, such as prophy angles, mandrels, and surgical burs. Proper instrument selection, coupled with appropriate technique, ensures optimal patient care. A quick reference assists in easy identification and application of these vital tools.
XIII. High-Speed Handpieces & Burs
High-speed handpieces are essential for efficient tooth preparation, utilizing burs to rapidly remove tooth structure. Operating at speeds between 300,000 and 450,000 RPM, they demand precise control and a thorough understanding of bur types. Proper technique minimizes vibration and maximizes patient comfort.
Burs are categorized by shape, size, and cutting efficiency. Common shapes include round, pear-shaped, and tapered burs, each suited for specific tasks like cavity preparation or crown lengthening. Grit size dictates the bur’s aggressiveness; coarser grits remove material quickly, while finer grits are used for finishing and smoothing.
This guide provides a quick reference for selecting the appropriate bur for each clinical situation. Understanding bur codes – a standardized system denoting shape, head size, shank type, and grit – is crucial. Maintaining bur sharpness and employing easy locking/unlocking mechanisms, like those found in modern handpieces, are vital for optimal performance.
XIV. Low-Speed Handpieces & Attachments
Low-speed handpieces, operating at speeds under 50,000 RPM, offer versatility for a wide range of procedures beyond initial tooth preparation. These handpieces are ideal for polishing, finishing, and applying restorative materials, providing greater control and precision.
A variety of attachments expand the functionality of low-speed handpieces. Prophy angles, with rubber cups, are used for stain removal and polishing. Mandrels hold abrasive points and brushes for interproximal cleaning and finishing. Surgical handpieces accommodate burs for minor surgical procedures.
This guide serves as a quick reference to understanding these attachments and their applications. Selecting the correct attachment is crucial for achieving optimal clinical results. Modern handpieces often feature easy tool locking/unlocking mechanisms, enhancing efficiency. Proper maintenance, including lubrication and sterilization, ensures longevity and reliable performance.
XV. Restorative Instruments
Restorative instruments are specifically designed for placing, condensing, and contouring restorative materials like amalgam and composites. This guide highlights the key types and their appropriate uses, ensuring optimal treatment outcomes. Understanding the nuances of each instrument is vital for dental professionals.
Amalgam instruments, traditionally used for silver fillings, include carriers for transporting the amalgam, condensers for packing it into the cavity, and carvers for shaping the restoration. Composite instruments, used with tooth-colored resins, feature specialized tips for placement, layering, and sculpting.
A quick reference to instrument shapes – such as spoons, chisels, and hoes – aids in selecting the correct tool for each step. Proper technique and instrument maintenance are essential for achieving durable and aesthetically pleasing restorations. Modern instruments prioritize easy handling and precision.
XVI. Amalgam Instruments
Amalgam instruments are a set of tools specifically designed for the placement and manipulation of dental amalgam, a traditional restorative material. This section provides a quick reference to the core instruments and their functions, crucial for understanding restorative procedures.
Key instruments include the amalgam carrier, used to transport the mixed amalgam to the tooth; condensers, employed to firmly pack the amalgam into the prepared cavity, ensuring a dense and durable restoration; and carvers, utilized to shape and contour the amalgam to match the natural tooth anatomy.
Different condenser shapes – such as wheel, ball, and flame – offer varying degrees of condensation force and access. Instrument handles are often designed for easy grip and control. Proper technique, including adequate condensation pressure and careful carving, is vital for long-lasting amalgam restorations. Maintaining instrument sharpness is also essential for optimal performance.
XVII. Composite Instruments
Composite instruments are specialized tools used for placing, contouring, and finishing tooth-colored composite resin restorations. This section serves as a quick reference guide to the essential instruments and their applications in modern restorative dentistry.
Key instruments include composite placement instruments, often with thin, flexible blades for precise material application; anatomically shaped carvers for sculpting the composite to mimic natural tooth form; and finishing burs and abrasive strips for polishing and smoothing the restoration. Instruments are frequently made of resin-compatible materials to prevent sticking.
Unlike amalgam, composite requires layering and light-curing, demanding instruments that facilitate precise placement and adaptation. Instrument design prioritizes easy manipulation and control. Proper technique involves incremental placement, careful contouring, and thorough polishing to achieve esthetic and functional results. Maintaining instrument cleanliness prevents composite adhesion and ensures optimal performance.
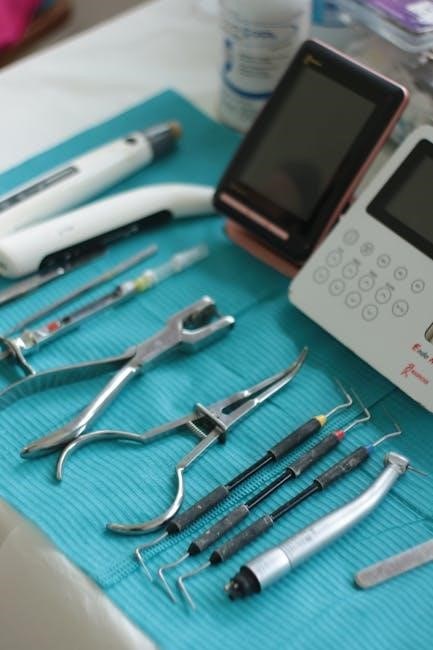
XVIII. Impression Materials & Instruments
Impression materials and accompanying instruments are crucial for creating accurate replicas of oral structures, essential for restorative procedures, prosthodontics, and orthodontic treatment planning. This section details the materials and tools used to capture these vital records, serving as a quick reference for dental professionals.
Common impression materials include alginate, polyether, polyvinyl siloxane (PVS), and hydrocolloid. Each material possesses unique properties regarding accuracy, working time, and compatibility with different restorations. Corresponding instruments include impression trays – stock or custom-made – mixing bowls and spatulas for material preparation, and impression guns for controlled material delivery.
Tray selection is paramount for accurate impressions; trays must properly fit the patient’s arch and extend sufficiently to capture all necessary tissues. Mixing techniques must adhere to manufacturer instructions to ensure material properties are optimized. Proper handling minimizes distortion and voids, resulting in a diagnostic or working cast.
XIX. Tray Selection & Handling
Tray selection is a critical step in accurate impression taking. Both stock and custom trays are available, each serving specific clinical needs. Stock trays come in various sizes and shapes, offering a convenient, immediate solution, while custom trays provide superior adaptation and retention for complex cases. The tray’s size must extend beyond the mucogingival junction to capture all necessary tissues without impinging on soft tissues.
Handling impression trays requires careful attention to detail. Before loading with impression material, trays should be inspected for damage or distortion. Proper disinfection protocols must be followed between patients; During placement, trays are stabilized using cheek retractors or finger pressure to prevent movement during setting.
Removing the tray requires a smooth, controlled motion to avoid tearing the impression. A quick reference guide for tray selection considers arch size, depth of sulcus, and the presence of anatomical landmarks. Proper tray handling minimizes errors and ensures a faithful reproduction of the patient’s oral anatomy.
XX. Mixing & Application Techniques
Mixing impression materials demands precision to achieve optimal setting characteristics. Whether utilizing alginate, polyether, or polyvinyl siloxane (PVS), adhering to manufacturer’s instructions regarding powder-to-liquid ratios is paramount. Mechanical mixing, using a spatula or automated mixer, ensures homogeneity and minimizes air bubble incorporation. Hand mixing requires a consistent, figure-eight motion.
Application techniques vary based on the material and clinical situation. For alginate, a tray is loaded quickly and seated firmly. PVS and polyether require a thin, even layer to prevent voids. A quick reference emphasizes the importance of working rapidly to prevent premature setting. Light body materials are often syringe-applied directly into the sulcus for detail.
Proper technique minimizes distortion and ensures an accurate final impression. Post-application, the impression should be thoroughly inspected for voids or tears. Understanding material properties and employing correct mixing and application methods are crucial for successful restorative outcomes.
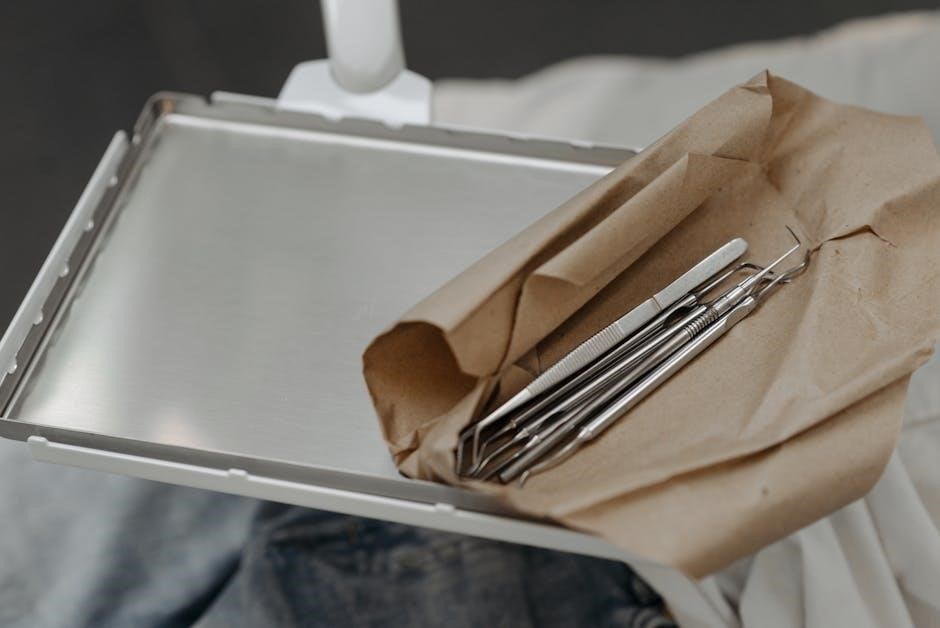
XXI. Sterilization & Maintenance of Instruments
Sterilization is paramount in dentistry to prevent cross-contamination. Common methods include autoclaving (steam sterilization), chemical sterilization, and dry heat sterilization. Autoclaving, utilizing high pressure and temperature, is the preferred method for most dental instruments. Proper packaging, using autoclavable pouches or wraps, maintains sterility until use. Biological indicators confirm sterilization efficacy.
Maintenance extends instrument lifespan and ensures optimal performance. Immediately after use, instruments should be rinsed to remove debris. Ultrasonic cleaning effectively removes stubborn residue. Following cleaning, instruments must be thoroughly dried to prevent corrosion. Sharpening is crucial for cutting instruments, maintaining their efficiency.
Regular inspection for damage, such as broken tips or loose joints, is essential. Damaged instruments should be repaired or replaced. A quick reference guide detailing sterilization cycles and maintenance schedules is vital for dental practices. Consistent adherence to these protocols safeguards both patients and dental professionals.
XXII. Quick Reference Guide to Common Instruments
Essential Instruments at a Glance: This quick reference guide provides a concise overview of frequently used dental instruments. Mouth mirrors aid visibility; explorers detect caries and irregularities. Periodontal probes measure pocket depths, crucial for gum disease assessment.
Cutting & Carving Tools: Scalers remove calculus, while curettes (universal and specific) adapt to tooth contours for subgingival scaling. Burs, available in various shapes and grits, are used with high and low-speed handpieces for cavity preparation and finishing. Understanding bur numbering systems is key.
Restorative Essentials: Amalgam instruments, like condensers and carriers, facilitate filling placement. Composite instruments, including applicators and carvers, shape and polish composite restorations. Proper instrument selection ensures efficient and precise procedures. Flashcard-style learning aids can enhance instrument recognition. Maintaining a well-organized instrument tray streamlines workflow.