Presidents Choice Spiral Ham Cooking Instructions: A Comprehensive Guide
Navigating the delightful world of Presidents Choice spiral ham requires understanding cooking times, methods, and ensuring a perfectly cooked, flavorful centerpiece for gatherings.
Understanding Your Ham
Before embarking on your culinary journey with a Presidents Choice spiral ham, grasping its fundamental characteristics is crucial. Hams vary significantly – some are fully cooked, requiring only warming, while others need complete cooking. Determining this is the first step.
Spiral hams, specifically, are pre-cooked and sliced in a spiral fashion for easy serving. However, they benefit greatly from gentle reheating to enhance moisture and flavor. Understanding whether your ham is bone-in or boneless also impacts cooking time; bone-in hams generally require longer cooking periods due to the bone’s insulating properties. Knowing these details ensures a tender, juicy, and delicious result, perfect for any festive occasion or family meal.
Types of Presidents Choice Spiral Hams
Presidents Choice offers a delightful variety of spiral hams, catering to diverse preferences and meal sizes. You’ll commonly find options ranging from smaller, convenient hams ideal for intimate gatherings to larger, substantial hams perfect for extended families or holiday feasts.
Variations often include different wood-smoking techniques, imparting unique flavor profiles – think hickory, maple, or applewood smoked. Some hams come with included glaze packets, simplifying the preparation process, while others are sold unglazed, allowing for customized glaze creations. Furthermore, Presidents Choice frequently offers both bone-in and boneless spiral ham options, impacting cooking times and carving ease. Identifying the specific type you’ve purchased is key to following the correct cooking instructions.
Checking if Your Ham is Pre-Cooked
Determining if your Presidents Choice spiral ham is pre-cooked is crucial for safe and delicious results. Most spiral hams sold today are fully cooked, meaning they’ve undergone a heating process to eliminate bacteria. However, they still require reheating to reach a safe internal temperature and enhance flavor.
The packaging will typically state clearly whether the ham is “fully cooked,” “cook before eating,” or “ready to eat.” Look for this information prominently displayed on the label. If unsure, treat the ham as if it requires cooking. Remember, reheating a pre-cooked ham isn’t the same as cooking a raw ham; it’s about warming it through and adding your desired glaze for a flavorful experience.
Preparing the Ham for Cooking
Proper preparation ensures your Presidents Choice spiral ham cooks evenly and boasts maximum flavor. Begin by removing the ham from its packaging, carefully discarding any included packets (often containing glaze or seasoning). Gently rinse the ham under cool water and pat it completely dry with paper towels. This removes any excess salt or preservatives from the surface.
While not essential, scoring the ham’s surface in a diamond pattern can help the glaze penetrate deeper, adding extra sweetness and visual appeal. Use a sharp knife to make shallow cuts, being careful not to cut too deeply into the meat. Now your ham is ready for your chosen cooking method!
Removing Packaging and Rinsing
The initial step in preparing your Presidents Choice spiral ham involves careful removal of all packaging materials. Begin by cutting open the vacuum-sealed wrapping, taking care not to damage the ham itself. Discard any included seasoning packets or glaze packets separately, as these are typically for post-cooking application.
Once unwrapped, gently rinse the entire surface of the ham under cool, running water. This crucial step helps to remove any excess salt or preservatives applied during processing. Pat the ham thoroughly dry with clean paper towels before proceeding to the next preparation stage. A dry surface promotes better glaze adhesion during cooking.
Scoring the Ham (Optional)
While not essential for a Presidents Choice spiral ham, scoring the surface can enhance glaze penetration and create a visually appealing presentation. Using a sharp knife, carefully make shallow, diamond-shaped cuts across the ham’s surface, approximately 1 inch apart. Avoid cutting too deeply, as this could cause the ham to dry out during cooking.
Scoring is particularly beneficial if you plan to use a thicker glaze. The cuts provide channels for the glaze to seep into the meat, resulting in a more flavorful and evenly coated ham. Remember, this step is purely aesthetic and functional; a delicious ham will result even without scoring.
Cooking Methods
Presidents Choice spiral hams offer versatility in cooking, adapting to various schedules and preferences. The three primary methods – oven baking, slow cooking, and Instant Pot cooking – each yield a uniquely tender and flavorful result. Oven baking remains the traditional approach, providing consistent heat for even cooking and beautiful glaze caramelization.
For those seeking ultimate tenderness and convenience, the slow cooker method excels, gently braising the ham to succulent perfection. Alternatively, the Instant Pot offers a remarkably quick and efficient cooking process, ideal for busy schedules. Choosing the right method depends on your time constraints and desired level of hands-on involvement.
Oven Baking – The Traditional Approach
Oven baking is the cornerstone of spiral ham preparation, delivering a classic and reliably delicious outcome. This method allows for even heat distribution, crucial for warming the ham through and achieving a beautifully browned, glazed exterior. It’s a fantastic choice when you want a hands-on approach and the aroma of a roasting ham filling your kitchen.
The process involves preheating the oven to a moderate temperature, typically around 325°F (160°C). The ham is then placed in a roasting pan, often with a liquid base to maintain moisture. Consistent monitoring and occasional basting with glaze are key to a perfectly cooked, flavorful spiral ham. This method provides excellent control over the final result.
Slow Cooker – For Tender, Moist Ham
For exceptionally tender and incredibly moist results, the slow cooker presents a remarkably convenient option for preparing your Presidents Choice spiral ham. This method excels at breaking down the ham’s tissues over an extended period, resulting in a fall-off-the-bone texture and maximum flavor absorption. It’s ideal for busy schedules, requiring minimal hands-on attention.
Typically, the ham is placed directly into the slow cooker, sometimes with a liquid base like pineapple juice or broth. Cooking on low for 6-8 hours, or high for 3-4, allows the ham to become unbelievably succulent. The slow cooker’s consistent, gentle heat prevents drying, ensuring a juicy and flavorful ham every time. Glaze can be added during the final hour of cooking.
Instant Pot – A Quick and Convenient Option
When time is of the essence, the Instant Pot offers a remarkably swift and convenient method for cooking your Presidents Choice spiral ham. This pressure cooking marvel drastically reduces cooking times while still delivering a moist and flavorful result. It’s perfect for last-minute gatherings or when oven space is limited.
Typically, a cup of liquid – such as water, broth, or juice – is added to the Instant Pot, followed by the ham. Cooking on high pressure for approximately 14-15 minutes per pound, followed by a natural pressure release, yields a tender ham. The sealed environment traps moisture, preventing dryness. Glaze can be applied after pressure cooking, using the sauté function for a quick caramelization.
Oven Baking Instructions – Detailed
Oven baking remains the classic and widely preferred method for preparing a Presidents Choice spiral ham, ensuring even cooking and a beautifully browned exterior. This detailed guide will walk you through each step for optimal results. Begin by ensuring your oven is properly calibrated for accurate temperature control, crucial for a perfectly cooked ham.
The baking process involves gentle heat, allowing the ham to warm through and develop its flavors. Covering the ham with foil initially helps retain moisture, preventing it from drying out. Later, removing the foil allows for glaze caramelization. Precise cooking times depend on whether the ham is bone-in or boneless, impacting overall heat penetration and tenderness.
Preheating the Oven
Proper oven preheating is paramount for successful spiral ham cooking, establishing a consistent temperature foundation for even heat distribution. Begin by setting your oven to the recommended temperature, typically around 325°F (160°C). Allow ample time – at least 20-30 minutes – for the oven to reach and stabilize at this temperature.
Using an oven thermometer is highly recommended to verify the accuracy of your oven’s internal settings, as variations can significantly impact cooking times and results. A well-preheated oven ensures the ham begins cooking immediately upon placement, preventing prolonged exposure to fluctuating temperatures that could compromise its texture and flavor. Consistent heat is key to a moist and tender final product.
Cooking Temperature and Time (Bone-In vs. Boneless)
Determining the correct cooking temperature and time hinges on whether your Presidents Choice spiral ham is bone-in or boneless. Generally, a bone-in ham requires a longer cooking duration due to the bone’s insulating properties. Aim for approximately 10-14 minutes per pound at 325°F (160°C).
Boneless hams, lacking this insulation, cook more rapidly – typically 15-18 minutes per pound at the same temperature. Always refer to the package instructions for specific guidance. Remember these are estimates; using a meat thermometer (discussed later) is crucial for accurate doneness. Under-cooking poses a safety risk, while overcooking leads to dryness. Consistent monitoring ensures a perfectly cooked, flavorful ham.
Glaze Application Timing
Strategic glaze application is key to achieving a beautifully finished Presidents Choice spiral ham. For optimal results, apply the first coat of glaze during the last 30-45 minutes of cooking. This allows the sugars to caramelize without burning, creating a glistening, flavorful crust.
Repeat the glaze application every 10-15 minutes during this final stage, building layers of deliciousness. Frequent basting ensures even coverage and prevents the glaze from becoming overly sticky or scorched. Avoid applying glaze too early, as it can become overly dark and potentially bitter. Patience and consistent basting are your allies in achieving a stunning, delectable glaze.
Glaze Recipes for Presidents Choice Spiral Ham
Elevate your Presidents Choice spiral ham with a captivating glaze! A well-chosen glaze complements the ham’s savory flavor, adding sweetness, tang, or spice. Consider a classic Brown Sugar and Mustard Glaze for a balanced profile, or a sophisticated Maple and Bourbon Glaze for a touch of warmth.
For a fruity twist, explore a vibrant Pineapple and Cherry Glaze. These recipes typically involve combining ingredients like brown sugar, mustard, maple syrup, bourbon, pineapple juice, and cherry preserves. Experiment with spices like cloves or cinnamon to personalize your glaze. Remember to brush generously during the final cooking stages for a beautiful, flavorful finish!
Brown Sugar and Mustard Glaze
This classic glaze offers a delightful balance of sweet and savory, perfectly complementing the Presidents Choice spiral ham. To create this flavorful coating, combine ¾ cup of packed brown sugar with ¼ cup of Dijon mustard. Add 2 tablespoons of honey for extra sweetness and depth. A teaspoon of ground cloves or cinnamon enhances the warm spice notes.
Whisk all ingredients together until smooth and well combined. During the last 30-45 minutes of cooking, brush the ham generously with the glaze every 10-15 minutes, building up a beautiful, caramelized crust. This glaze is incredibly versatile and consistently delivers a crowd-pleasing result!
Maple and Bourbon Glaze
For a sophisticated and subtly smoky glaze, the Maple and Bourbon combination is an excellent choice for your Presidents Choice spiral ham. Begin with ¾ cup of pure maple syrup – the darker the grade, the richer the flavor. Add ¼ cup of bourbon, ensuring it’s a quality brand for the best taste. Incorporate 2 tablespoons of brown sugar to deepen the sweetness and 1 tablespoon of Dijon mustard for a tangy counterpoint.
A dash of smoked paprika (about ½ teaspoon) will amplify the smoky notes. Whisk all ingredients thoroughly. Apply generously during the final 30-45 minutes of cooking, basting every 10-15 minutes for a glossy, flavorful finish. This glaze provides a truly memorable experience!
Pineapple and Cherry Glaze
If you prefer a sweeter, fruitier glaze, the Pineapple and Cherry combination offers a vibrant and delicious option for your Presidents Choice spiral ham. Start with 1 cup of pineapple juice, reduced slightly on the stovetop to concentrate the flavor. Add ¾ cup of cherry preserves – choose a variety with whole cherries for visual appeal. Incorporate 2 tablespoons of brown sugar for added sweetness and 1 tablespoon of apple cider vinegar to balance the richness.
A pinch of ground cloves (about ¼ teaspoon) enhances the fruity notes. Whisk well and apply during the last 30-45 minutes of cooking, basting frequently. This glaze creates a beautiful, glistening finish and a delightful tropical flavor profile.
Internal Temperature and Doneness
Achieving the perfect internal temperature is crucial for a safe and delicious Presidents Choice spiral ham. Relying solely on cooking time isn’t sufficient; a meat thermometer is your best friend. Insert the thermometer into the thickest part of the ham, avoiding the bone. Remember, most spiral hams are pre-cooked, so you’re primarily focusing on warming it through and enhancing flavor with a glaze.
The target internal temperature for a fully heated spiral ham is 140°F (60°C). This ensures it’s safe to eat and wonderfully warm. Check the temperature in multiple spots to guarantee even heating. Don’t overcook, as this can lead to a dry ham!
Using a Meat Thermometer
A meat thermometer is indispensable for accurately determining your Presidents Choice spiral ham’s doneness. Digital instant-read thermometers provide the quickest and most precise readings. Insert the probe into the thickest part of the ham, ensuring it doesn’t touch the bone, as this can give a falsely high reading. For larger hams, take readings in several locations to confirm even heating throughout.
Avoid opening the oven frequently during cooking, as this releases heat and extends cooking time. Check the temperature towards the end of the recommended cooking period. Clean the thermometer probe thoroughly with hot, soapy water before and after each use for hygiene.
Target Internal Temperature
Achieving the correct internal temperature is crucial for a safe and delicious Presidents Choice spiral ham. Since most spiral hams are pre-cooked, you’re primarily focused on reheating, not cooking from raw. The USDA recommends reheating ham to an internal temperature of 140°F (60°C). This ensures any potential bacteria are eliminated while maintaining the ham’s moisture and flavor.
However, some prefer a slightly warmer temperature, up to 165°F (74°C), for a more thoroughly heated experience. Regardless, consistently monitoring with a meat thermometer is key; Remember to check in multiple spots to guarantee even heating throughout the entire ham.
Resting the Ham
Allowing your Presidents Choice spiral ham to rest after cooking is a vital, often overlooked, step. This period allows the juices, redistributed during cooking, to settle back into the meat. Covering the ham loosely with foil during resting maintains warmth while preventing it from drying out. A resting time of approximately 15-20 minutes is generally recommended, depending on the size of the ham.
This rest period significantly improves the ham’s tenderness and juiciness, resulting in a more flavorful and enjoyable dining experience. Don’t skip this step – patience truly pays off when it comes to a perfectly prepared spiral ham!
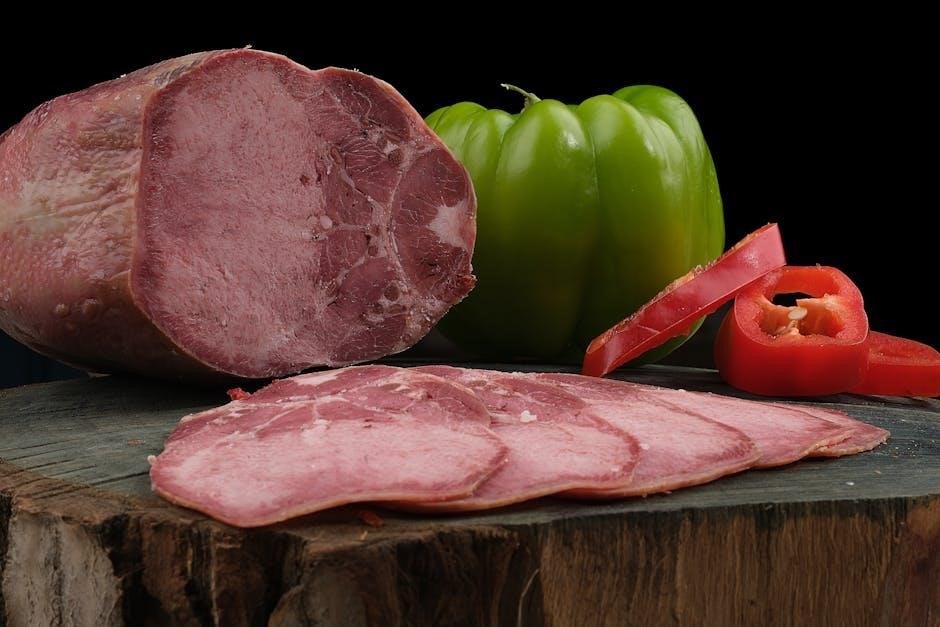
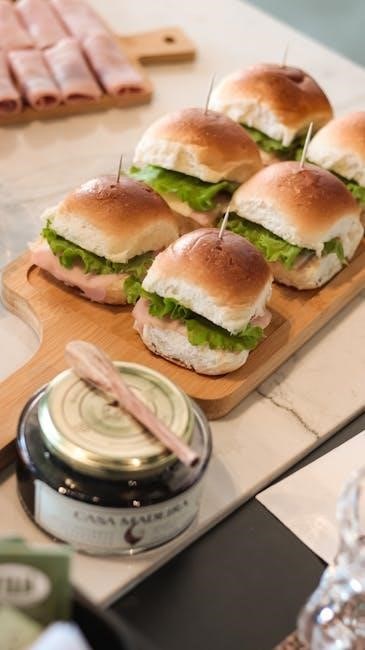
Carving the Ham
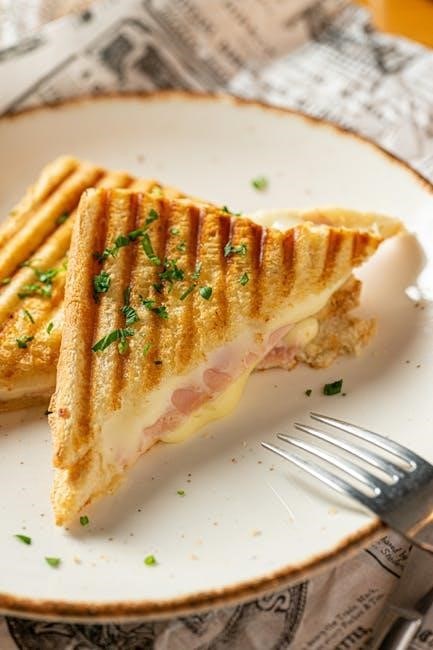
Carving a Presidents Choice spiral ham is surprisingly straightforward, thanks to the pre-cut spiral slices! Begin by placing the ham on a carving board with the flat side down. Using a carving fork to stabilize the ham, gently run a carving knife between the meat and the fat, following the spiral cuts.
Remove slices individually, or create a platter of layered slices for an impressive presentation. For a more refined look, you can trim excess fat from each slice. Serving suggestions include pairing the ham with roasted vegetables, scalloped potatoes, or a fresh fruit salad for a complete and satisfying meal.
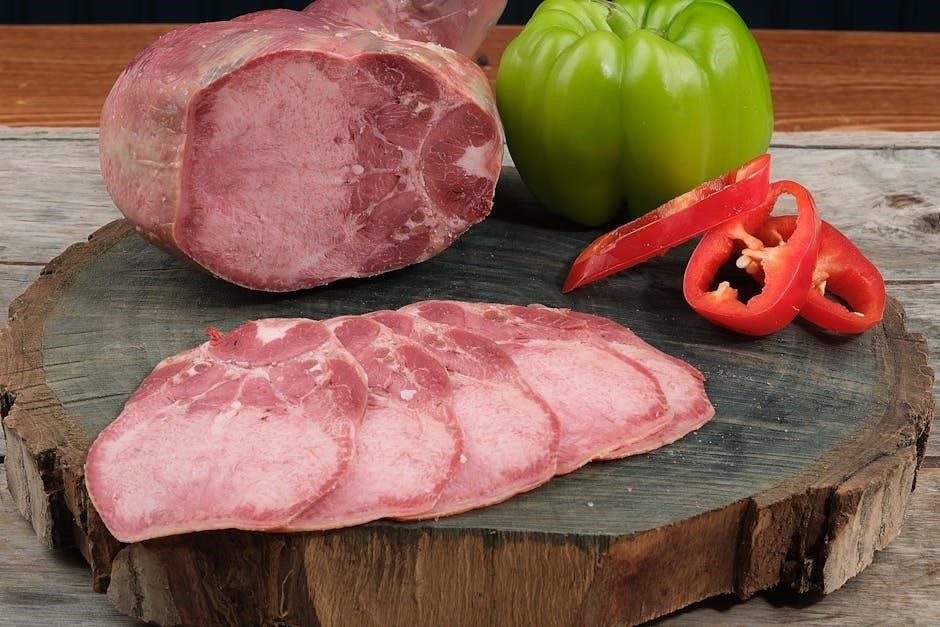
Spiral Ham Carving Techniques
Mastering spiral ham carving involves a few key techniques for beautiful presentation and easy serving. Start by identifying the natural seams created by the spiral cut – these are your guides. Use a long, thin-bladed carving knife and a sturdy carving fork.
Insert the fork firmly into the ham to stabilize it while you slice. Gently follow the curve of the spiral, releasing each slice as you go. Avoid sawing motions; instead, use a smooth, gliding cut. For thicker slices, angle the knife slightly. Remember to carve with the grain for maximum tenderness and enjoyability.
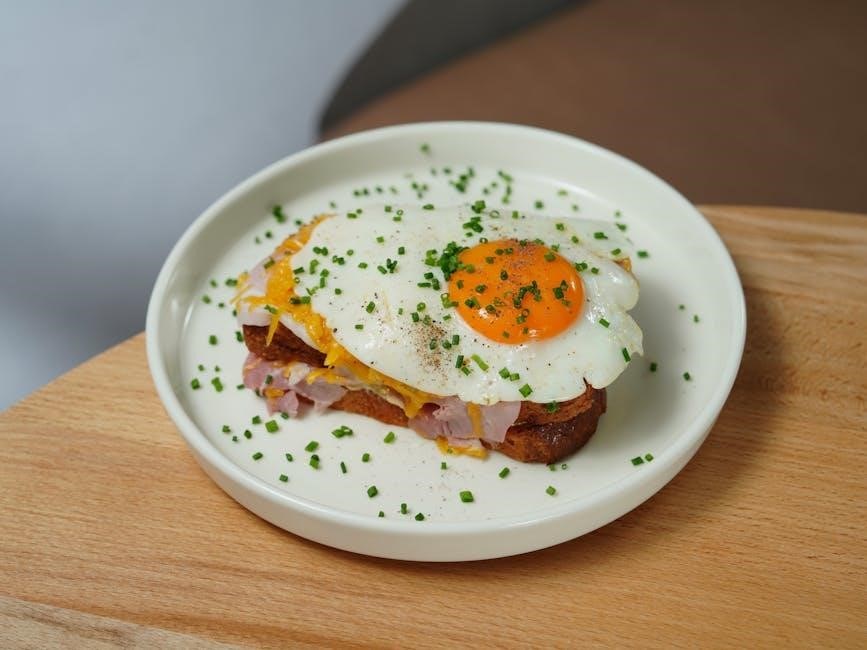
Serving Suggestions
A perfectly cooked Presidents Choice spiral ham deserves equally delightful accompaniments! Classic pairings include scalloped potatoes, roasted vegetables like Brussels sprouts or carrots, and a vibrant green bean casserole. Don’t forget a sweet side – pineapple casserole or glazed sweet potatoes complement the ham’s savory flavor beautifully.
For a lighter meal, consider a fresh fruit salad or a simple green salad with a vinaigrette dressing. Crusty bread or dinner rolls are essential for soaking up the delicious pan juices. A tangy mustard or a fruit chutney adds a lovely contrast. Ultimately, serving is about creating a memorable and satisfying dining experience for your guests!
Safety Considerations
Handling and storing ham properly is crucial for food safety. Always refrigerate the ham promptly upon purchase, maintaining a temperature below 40°F (4°C). Ensure thorough cooking to an internal temperature of 145°F (63°C) to eliminate any potential bacteria. Use a reliable meat thermometer to verify doneness.
Leftover ham should be refrigerated within two hours of cooking and consumed within 3-4 days. When reheating, ensure it reaches an internal temperature of 165°F (74°C). Proper storage prevents bacterial growth and ensures a safe and enjoyable meal. Avoid cross-contamination by using separate cutting boards and utensils for raw and cooked foods.
Proper Ham Storage
Maintaining optimal storage conditions is vital for preserving the quality and safety of your Presidents Choice spiral ham. Before cooking, keep the ham refrigerated at a temperature consistently below 40°F (4°C). Store it in its original packaging, or tightly wrapped in plastic wrap, to prevent drying and odor absorption.
After cooking, promptly refrigerate leftover ham within two hours. Divide larger portions into smaller containers for quicker cooling and even temperature distribution. Properly stored cooked ham remains safe for consumption for approximately 3-4 days. Freezing is also an option; wrap tightly in freezer-safe packaging for up to 1-2 months, though texture may change upon thawing.
Reheating Leftover Ham
Successfully reheating leftover Presidents Choice spiral ham ensures it remains both delicious and safe to eat. The preferred method depends on the quantity and desired speed. For smaller portions, microwave reheating is convenient; cover with a damp paper towel to retain moisture and reheat in short intervals, stirring between each, until warmed through.
For larger portions, oven reheating is recommended. Preheat your oven to 325°F (160°C), place the ham in a baking dish with a little liquid (broth or water) to prevent drying, and cover with foil. Heat for approximately 10-15 minutes per pound, or until the internal temperature reaches 140°F (60°C). Avoid over-reheating, as this can lead to dryness.
Troubleshooting Common Issues
Even with careful preparation, occasional issues can arise when cooking a Presidents Choice spiral ham. A common concern is a dry ham; this often results from overcooking. Ensure accurate temperature monitoring with a meat thermometer and avoid exceeding the recommended internal temperature. If dryness occurs, baste frequently during cooking or add a little liquid to the pan.
Another issue is a burning glaze. To prevent this, apply the glaze during the final 30-45 minutes of cooking and monitor closely. If the glaze begins to darken too quickly, tent the ham loosely with foil. Remember, consistent oven temperature and proper timing are key to avoiding these problems and achieving a perfectly cooked ham.
Ham is Too Dry
A dry spiral ham can be disappointing, but often easily remedied. The primary cause is typically overcooking, stripping the ham of its natural moisture. To combat this, consistently monitor the internal temperature using a reliable meat thermometer, aiming for the recommended 140°F. Frequent basting during the cooking process is crucial; use pan juices, broth, or even a little water to keep the surface moist.
If the ham is already dry, consider adding a small amount of liquid – apple juice or pineapple juice work well – to the bottom of the pan during the last 30 minutes. Covering the ham loosely with foil can also help retain moisture. Remember, a slightly pink hue is acceptable, prioritizing juiciness over complete color change.
Glaze is Burning
A beautifully glazed ham is desirable, but a burnt glaze can quickly ruin the presentation and flavor. The most common culprit is excessive heat or prolonged cooking time, especially with glazes containing high sugar content. To prevent burning, reduce the oven temperature slightly when applying the glaze, and monitor closely.
Applying the glaze in multiple thin layers, rather than one thick coat, allows for better caramelization without burning. If you notice the glaze is browning too quickly, tent the ham loosely with aluminum foil. Regularly check the ham, basting with pan juices to help regulate the temperature and prevent sticking. A slightly darker glaze is fine, but avoid any signs of charring.