Honeywell Pro Series T721 Thermostat: A Comprehensive Guide
The Honeywell Pro Series T721 expertly manages heating and cooling, optimizing engine temperatures for peak performance and smart home integration, as detailed in this manual.
The Honeywell Pro Series T721 is a smart, Wi-Fi enabled thermostat designed to provide precise temperature control and enhanced energy efficiency for your home. This thermostat isn’t just about setting a temperature; it’s about creating a comfortable and convenient living environment tailored to your lifestyle. It regulates coolant recirculation and radiator cooling, maintaining specific engine temperatures – a feature extending beyond typical home heating and cooling.
This comprehensive guide will walk you through everything you need to know, from unboxing and installation to advanced features and troubleshooting. Whether you’re a seasoned DIY enthusiast or a first-time thermostat installer, this manual provides clear, step-by-step instructions. The T721 seamlessly integrates into smart home ecosystems, offering remote control and voice assistant compatibility. Prepare to unlock a new level of comfort and control with the Honeywell T721!
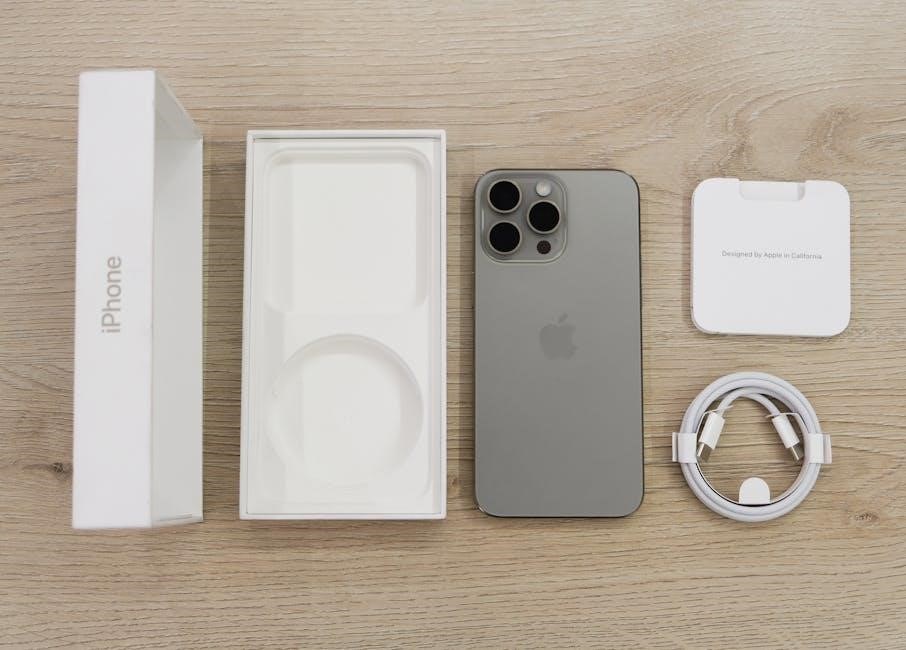
What’s in the Box: T721 Package Contents
Upon opening your Honeywell Pro Series T721 thermostat package, you’ll find several key components ensuring a smooth installation and setup process. The core of the package, of course, is the T721 thermostat unit itself, featuring a sleek and modern design. Alongside the thermostat, you’ll receive a backplate for wall mounting, essential for secure installation.
A comprehensive installation guide is included, providing step-by-step instructions and wiring diagrams. You’ll also find mounting screws and wall anchors to accommodate various wall types. Wire labels are provided to help you accurately identify existing wiring during installation, minimizing confusion. Finally, a quick start guide offers a simplified overview for immediate setup. Verify all components are present before beginning the installation process to ensure a hassle-free experience.
Key Features and Benefits of the T721
The Honeywell Pro Series T721 thermostat boasts a range of features designed for optimal comfort and energy savings. Its intuitive touchscreen display provides easy control and clear visibility of settings. Wi-Fi connectivity enables remote access and control via the Honeywell Home app, allowing adjustments from anywhere. Smart learning capabilities adapt to your schedule, optimizing temperature for maximum efficiency.
Geofencing technology automatically adjusts the temperature based on your location, ensuring comfort upon arrival and savings when away. Customizable scheduling allows for personalized comfort profiles. Compatibility with voice assistants like Amazon Alexa and Google Assistant offers hands-free control; Detailed energy reports provide insights into usage patterns, helping you identify potential savings. The T721 delivers a smart and convenient heating and cooling experience.
Installation and Setup
Proper installation ensures optimal performance of your T721 thermostat. Carefully follow the provided wiring diagrams and setup instructions for a seamless integration process.
Compatibility Check: HVAC Systems Supported
Before beginning installation, verifying compatibility with your existing HVAC system is crucial for ensuring proper functionality of the Honeywell T721 Pro Series thermostat. This thermostat is designed to work with a wide range of systems, but certain configurations may require additional components or may not be supported.
The T721 is generally compatible with standard 24V heating and cooling systems, including forced air (gas, oil, electric), heat pumps (with and without auxiliary heat), and radiant heat. It supports single-stage, multi-stage, and heat pump systems. However, it is not compatible with high-voltage systems (110V/220V) or millivolt systems.
Specifically, confirm your system does not utilize a line voltage thermostat. If you have a baseboard heater operating on 240V, the T721 is not suitable. Always consult the detailed compatibility list within the T721 manual or on the Honeywell Home website to confirm support for your specific HVAC setup before proceeding with installation. Incorrect installation can damage the thermostat and your HVAC system.
Wiring the T721: A Step-by-Step Guide
Prior to wiring, always disconnect power to your HVAC system at the breaker box to prevent electrical shock. Carefully remove your old thermostat, labeling each wire with the corresponding terminal designation. The T721 utilizes a standard color-coded wiring scheme, but verifying labels is essential.
Connect the wires to the T721’s terminal block, matching the labels from your old thermostat. Common terminals include Rh (heating power), Rc (cooling power), W (heating), Y (cooling), G (fan), and C (common – required for consistent power). A ‘C’ wire adapter may be needed if one isn’t present.
Ensure wires are securely fastened to the terminals. Gently push any excess wire back into the wall. Double-check all connections against the wiring diagram in the T721 manual. Once confirmed, restore power at the breaker. Incorrect wiring can cause system malfunction or damage; if unsure, consult a qualified HVAC technician.

Connecting to Wi-Fi: Network Configuration
To connect your Honeywell T721 to Wi-Fi, begin by downloading and installing the Honeywell Home app on your smartphone or tablet. Ensure your home Wi-Fi network is operating on the 2.4 GHz band, as the T721 doesn’t support 5 GHz networks. Open the Honeywell Home app and create an account or log in if you already have one.
Follow the in-app instructions to add a new thermostat. The app will guide you through the process of putting the T721 into pairing mode. Select your Wi-Fi network from the list and enter your network password when prompted. The thermostat will attempt to connect to your network.
A successful connection is indicated by a Wi-Fi icon appearing on the thermostat display. If the connection fails, double-check your password and ensure the thermostat is within range of your router. Refer to the troubleshooting section of the T721 manual for further assistance.
Registering Your Thermostat: Honeywell Home App
Registering your Honeywell T721 thermostat within the Honeywell Home app unlocks its full potential and enables remote control features. After successfully connecting to Wi-Fi, the app will prompt you to register your device. This process links the thermostat to your Honeywell Home account.
During registration, you’ll be asked to provide a name and location for your thermostat. This helps organize multiple thermostats if you have them. You may also be offered optional services, such as energy savings programs or alerts; Review these options carefully before accepting.
Registration allows access to features like remote temperature adjustments, scheduling, geofencing, and energy usage reports. It also ensures you receive important firmware updates and access to Honeywell’s customer support resources; A registered thermostat is crucial for maximizing convenience and efficiency.
Understanding the T721 Interface
The T721 boasts an intuitive touchscreen display, providing easy access to settings, schedules, and temperature controls for optimal comfort and efficient home management.
Display Overview: Icons and Indicators
The Honeywell T721’s display is designed for clarity and ease of use. The prominent temperature display shows the current room temperature, alongside the setpoint temperature. A flame icon indicates the heating system is active, while a snowflake signifies cooling is in progress. A fan icon displays the fan’s operational status – auto or on.
Wi-Fi signal strength is indicated by a series of curved lines, ensuring a stable connection to the Honeywell Home app. Battery level is shown with a battery icon, alerting you when replacement is needed. System mode icons (Heat, Cool, Auto, Off) clearly display the current operating mode.
Additional indicators include a schedule icon when a programmed schedule is active, and a hold icon when a temporary temperature override is in effect. A filter change reminder will appear when it’s time to replace your air filter, promoting optimal system performance and air quality. Understanding these icons allows for quick assessment of your home’s climate control status.
Navigating the Menu: Basic Operations
The Honeywell T721 utilizes a simple, intuitive menu system accessed via the touchscreen display. To enter the menu, tap the menu icon (typically three horizontal lines). Use the up and down arrow buttons to scroll through options like “Schedule,” “Settings,” “System,” and “Information.” Select an option by tapping on it.
Within each menu, further options are presented. The “Back” button returns you to the previous screen. Adjusting temperature setpoints is straightforward: simply use the plus and minus buttons on the main screen. To temporarily override the schedule, use the “Hold” function, specifying a duration or indefinite hold.
The “System” menu allows switching between Heat, Cool, Auto, and Off modes. Explore the “Settings” menu to customize display preferences, date/time, and network connections. Familiarizing yourself with these basic operations ensures effortless control over your home’s comfort.
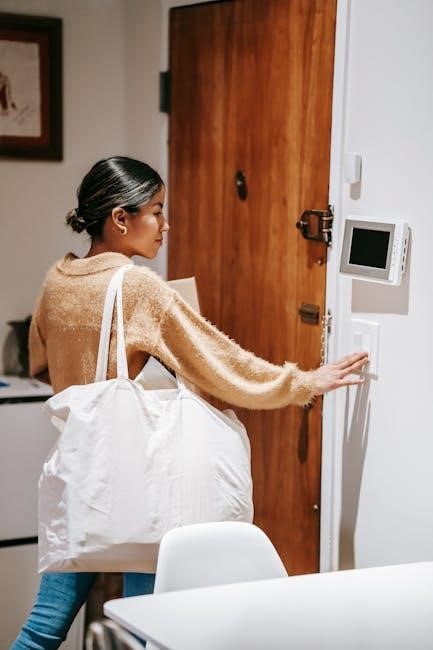
Geofencing Setup: Automated Temperature Control
The Honeywell T721’s geofencing feature leverages your smartphone’s location to automatically adjust the temperature, maximizing comfort and energy savings. To enable geofencing, access the Honeywell Home app and navigate to your thermostat’s settings. Define a virtual “fence” around your home – a circular radius representing your typical arrival and departure points.
Within the app, specify desired temperatures for “Away” (when you’re outside the geofence) and “Home” (when you’re inside). The thermostat will seamlessly switch between these settings based on your phone’s location. Ensure location services are enabled for the Honeywell Home app on your smartphone for accurate geofencing functionality.
You can add multiple users to the geofence, allowing the system to respond to anyone’s presence. Fine-tune the geofence radius and temperature settings to personalize your automated comfort experience.
Scheduling Programs: Creating Custom Comfort Profiles
The Honeywell T721 allows for highly customizable scheduling programs, enabling you to create unique comfort profiles tailored to your daily routine. Access the scheduling feature through the Honeywell Home app or directly on the thermostat’s touchscreen. You can define different temperature settings for various times of the day and days of the week.
Create separate schedules for weekdays and weekends, or even individual days, to accommodate varying lifestyles. Program specific temperatures for wake-up, leave, return, and sleep periods. The T721 supports multiple schedules, allowing for different settings for family members or zones within your home.
Utilize the app’s intuitive interface to easily adjust schedules and override settings as needed. Regularly reviewing and refining your schedules ensures optimal comfort and energy efficiency.

Advanced Features and Settings
Explore the T721’s intelligent capabilities, including smart learning, remote control via the Honeywell Home app, and seamless voice assistant integration for enhanced convenience.
Smart Learning: Adaptive Temperature Adjustment
The Honeywell T721 boasts a sophisticated Smart Learning feature designed to optimize your home’s comfort and energy efficiency. This intelligent system observes your temperature adjustments and daily routines over a period of time – typically a week – to create a personalized heating and cooling schedule.
Instead of manually programming a rigid schedule, the T721 learns when you prefer certain temperatures. For example, it will recognize when you consistently lower the temperature before bedtime or raise it in the morning. The thermostat then proactively adjusts the temperature based on these learned patterns, ensuring optimal comfort without requiring constant manual intervention.
To activate Smart Learning, simply operate your thermostat as you normally would for a few days. The T721 will automatically begin analyzing your preferences. You can review and refine the generated schedule within the Honeywell Home app, making any necessary adjustments to perfectly suit your lifestyle. This feature significantly reduces energy waste and provides a truly customized comfort experience.
Remote Control via Honeywell Home App
The Honeywell Home app unlocks the full potential of your T721 thermostat, providing convenient remote control from anywhere with an internet connection. After registering your thermostat and connecting it to your home’s Wi-Fi network, you can download the free Honeywell Home app for iOS or Android devices.
Through the app, you can adjust the temperature, view current settings, and manage your heating and cooling schedules – all from your smartphone or tablet. This is particularly useful when you’re away from home, allowing you to ensure comfort upon your return or to conserve energy if your plans change unexpectedly.
The app also provides access to advanced features like geofencing and energy usage reports. You’ll receive alerts and notifications regarding system status and potential issues. Remote control offers unparalleled convenience and peace of mind, putting complete climate control at your fingertips, regardless of your location.
Voice Control Integration: Amazon Alexa & Google Assistant
The Honeywell T721 seamlessly integrates with popular voice assistants, Amazon Alexa and Google Assistant, offering hands-free temperature control. To enable this feature, you’ll first need to link your Honeywell Home account within the Alexa or Google Home app.
Once linked, you can use simple voice commands to adjust the temperature, such as “Alexa, set the thermostat to 72 degrees” or “Hey Google, increase the temperature by two degrees.” You can also ask for the current temperature reading or switch between heating and cooling modes using voice commands.
This integration provides added convenience and accessibility, especially when your hands are full or you’re across the room. It’s a fantastic way to experience the full benefits of a smart home, allowing you to manage your comfort with just your voice. Detailed setup instructions are available within the Honeywell Home app.
Energy Savings Reports: Monitoring Usage and Costs
The Honeywell T721, through the Honeywell Home app, provides detailed energy usage reports, empowering you to understand and optimize your heating and cooling costs. These reports visually display your energy consumption patterns over time – daily, weekly, or monthly – allowing you to identify areas for improvement.
You can track your heating and cooling runtime, compare usage across different periods, and estimate associated costs based on your local energy rates. The app also offers personalized tips and recommendations to help you reduce energy waste and save money.
By analyzing these reports, you can fine-tune your scheduling programs, adjust temperature settings, and make informed decisions about your home’s energy efficiency. This feature promotes responsible energy consumption and contributes to a more sustainable lifestyle, all accessible through a user-friendly interface.

Troubleshooting Common Issues
This section of the T721 manual details solutions for frequent problems, including power failures, Wi-Fi connectivity issues, inaccurate readings, and error code resolutions.
Thermostat Not Powering On: Diagnostic Steps
If your Honeywell T721 thermostat fails to power on, begin with a simple check of the circuit breaker controlling your HVAC system; ensure it hasn’t tripped. Next, verify the thermostat’s wiring connections, referencing the wiring diagram in this manual, to confirm secure and correct placement of each wire.
Inspect the C-wire (common wire) connection, as this is crucial for consistent power. If a C-wire isn’t present, a C-wire adapter might be necessary – consult a qualified HVAC technician for installation.
Check the batteries, even if the thermostat is wired, as they often provide backup power. Replace them with fresh batteries. If the issue persists, disconnect the power to your HVAC system at the breaker before carefully removing the thermostat from the wall plate to inspect for any visible damage to the wiring or the thermostat itself. If damage is apparent, or you remain unable to resolve the issue, contact Honeywell Home support for further assistance.
Wi-Fi Connection Problems: Solutions
Experiencing Wi-Fi connectivity issues with your Honeywell T721? First, confirm your home Wi-Fi network is functioning correctly with other devices. Ensure the thermostat is within range of your router; walls and distance can impact signal strength. Restart both your router and the T721 thermostat – a simple reboot often resolves temporary glitches.
Double-check you’ve entered the correct Wi-Fi password during setup within the Honeywell Home app. Verify your router’s security settings; the T721 supports 2.4 GHz networks, and some routers may require adjustments to accommodate this.
If problems persist, try temporarily disabling your router’s firewall or MAC address filtering to see if these are blocking the connection. Refer to your router’s manual for instructions. Finally, ensure your Honeywell Home app is updated to the latest version. If all else fails, contact Honeywell Home support for dedicated assistance.
Incorrect Temperature Readings: Calibration
If your Honeywell T721 displays inaccurate temperature readings, calibration is necessary. Begin by comparing the thermostat’s reading to a trusted thermometer placed nearby, avoiding direct sunlight or drafts. Access the thermostat’s settings menu – typically through the touchscreen interface – and locate the “Calibration” option.
The T721 allows for temperature offset adjustments, usually in increments of one degree Fahrenheit. Carefully increase or decrease the offset value until the thermostat reading matches your trusted thermometer. Avoid large calibration adjustments; smaller increments yield more accurate results.
Remember to document the calibration offset for future reference. Regularly check the accuracy, especially after power outages or significant environmental changes. If persistent inaccuracies remain after calibration, consider relocating the thermostat to a more representative location within your home, away from heat sources or cold drafts.
Error Codes: Decoding and Resolving
The Honeywell T721 utilizes error codes to diagnose system malfunctions. When an error occurs, the display will show a specific code, often accompanied by a descriptive message. Consult the comprehensive error code list within the Honeywell Home app or the official online manual to understand the issue.
Common codes relate to wiring problems (e.g., short circuits, open connections), HVAC system failures (e.g., blower motor issues, compressor errors), or communication breakdowns. For wiring errors, carefully re-examine the connections, ensuring proper placement and secure fastening. System failures may require professional HVAC technician assistance.
Before contacting support, attempt a thermostat reset by removing it from the wall plate for 30 seconds. Document the error code and any accompanying symptoms for efficient troubleshooting with Honeywell support. Ignoring error codes can lead to further system damage.
Maintenance and Support
Regular upkeep, like battery checks and cleaning, ensures optimal performance. Honeywell provides extensive support resources, including manuals, FAQs, and direct contact options.
Battery Replacement: Maintaining Functionality
The Honeywell T721 thermostat utilizes batteries as a backup power source, ensuring continued operation even during power outages. While typically powered by your HVAC system’s wiring, maintaining fresh batteries is crucial for reliable performance and preventing unexpected disruptions to your heating and cooling schedule.
The T721 requires two AA alkaline batteries. A low battery indicator will appear on the display, prompting replacement. To access the battery compartment, gently remove the thermostat faceplate – it usually snaps off with minimal effort. Insert the new batteries, ensuring correct polarity (+ and -), as indicated inside the compartment.
Replace both batteries simultaneously, even if only one appears depleted, to avoid potential issues. After replacement, the thermostat will briefly display a confirmation message. Regularly checking battery levels, especially during peak heating or cooling seasons, will guarantee uninterrupted comfort and accurate temperature control. Refer to the full manual for detailed diagrams and troubleshooting tips.
Cleaning the Thermostat: Best Practices
Maintaining a clean Honeywell T721 thermostat ensures optimal performance and a clear display. Dust and debris can accumulate over time, potentially affecting touch sensitivity and overall aesthetics. Regular cleaning is a simple process that contributes to the longevity of your device.
Before cleaning, always turn off power to the HVAC system at the breaker to prevent electrical shock. Use a soft, dry microfiber cloth to gently wipe the thermostat’s faceplate and surrounding areas. Avoid using water, cleaning solutions, or abrasive materials, as these can damage the screen and finish.
For stubborn smudges, lightly dampen the cloth with water, ensuring it’s almost dry before wiping. Do not spray liquid directly onto the thermostat. Pay attention to the edges and corners where dust tends to collect. A small, soft brush can be used to carefully remove dust from vents or crevices. Regular, gentle cleaning will keep your T721 looking its best and functioning flawlessly.
Honeywell Support Resources: Contact Information
Should you encounter any issues with your Honeywell T721 Pro Series Thermostat, comprehensive support resources are readily available. Honeywell offers a variety of channels to assist you, ensuring a smooth user experience. For immediate assistance, visit the Honeywell Home support website at home.honeywell.com, where you’ll find an extensive FAQ section, troubleshooting guides, and downloadable manuals.
You can also connect with Honeywell Support directly via phone. Call 1-800-468-1513 for technical support and assistance with installation, setup, or troubleshooting. Their dedicated team is available to address your concerns. Furthermore, Honeywell provides active support through their online community forums, allowing users to share tips and solutions.
For specific warranty information or to register your product, visit the Honeywell website. Don’t hesitate to leverage these resources to maximize your T721’s functionality and enjoy a comfortable, efficient home environment.
Firmware Updates: Keeping Your T721 Current
Maintaining the latest firmware on your Honeywell T721 Pro Series Thermostat is crucial for optimal performance, security, and access to new features. Honeywell regularly releases firmware updates to enhance functionality and address potential vulnerabilities. These updates are typically delivered automatically over your Wi-Fi connection, provided your thermostat is connected to the Honeywell Home app.
To manually check for updates, navigate to the “Settings” menu within the Honeywell Home app and select “Thermostat Settings,” then “About.” From there, you can initiate a firmware check. Ensure a stable Wi-Fi connection during the update process, which may take several minutes.
Regular updates ensure compatibility with the Honeywell Home ecosystem and provide the best possible user experience. Ignoring updates could lead to diminished performance or security risks. Prioritize keeping your T721 current for a consistently reliable and efficient smart home experience.