Automatic to Manual Conversion Kit: A Comprehensive Guide
Embarking on an automatic to manual transmission swap requires careful planning and execution‚ often involving specialized kits and a thorough understanding of vehicle mechanics.
Understanding the Conversion Process
The conversion from automatic to manual transmission is a substantial undertaking‚ fundamentally altering the vehicle’s drivetrain. It involves removing the existing automatic transmission‚ torque converter‚ and associated components. Subsequently‚ a manual transmission‚ clutch assembly‚ flywheel‚ shifter mechanism‚ and pedal assembly must be installed.
This isn’t merely a parts swap; it’s a system integration. The process often necessitates modifications to the vehicle’s wiring harness and potentially the Engine Control Unit (ECU) for proper operation. Adapter kits facilitate compatibility‚ but careful consideration of specific vehicle models – like the 8th Gen Civic – is crucial due to potential fitment issues. Thorough research and planning are paramount for a successful conversion‚ ensuring all components work harmoniously.
Why Convert from Automatic to Manual?
The desire to switch from automatic to manual often stems from a pursuit of enhanced driving engagement and control. Many enthusiasts prefer the direct connection and involvement a manual transmission provides‚ fostering a more visceral driving experience. While not always cost-effective‚ the conversion can significantly alter a vehicle’s character.
Furthermore‚ some conversions are driven by a desire for increased performance or reliability. Manual transmissions can sometimes offer better power transfer efficiency. For specific models‚ like a stock 8th gen Civic acquired cheaply‚ a manual swap can address perceived limitations. Ultimately‚ the decision hinges on personal preference and the desired driving dynamics.
Cost Analysis: Is the Conversion Worth It?
Converting from automatic to manual is rarely a budget-friendly undertaking. While the initial cost of a conversion kit can seem reasonable‚ the overall expense quickly escalates with additional components and potential labor. Sourcing used parts‚ like pedals‚ can mitigate costs‚ but introduces compatibility concerns.
Consider the value of your time and potential unforeseen expenses. ECU remapping and driveshaft modifications may be necessary‚ adding to the financial burden. Given the complexity‚ professional installation is often recommended‚ further increasing the total cost. Carefully weigh these factors against the benefits to determine if the conversion aligns with your budget and goals.

Components of a Typical Conversion Kit
A comprehensive kit generally includes a transmission‚ clutch assembly‚ shifter linkage‚ and necessary hardware‚ though pedals and ECU tuning are often sourced separately.
Transmission Options and Compatibility
Selecting the correct manual transmission is paramount for a successful conversion. Compatibility hinges on engine type‚ vehicle model‚ and desired gear ratios. Often‚ sourcing a transmission from a similar vehicle originally equipped with a manual gearbox simplifies the process considerably. Adapter kits exist to bridge the gap when direct fits aren’t available‚ allowing for broader transmission choices‚ but these introduce complexity.
Consider the transmission’s gear ratios in relation to your driving style and vehicle usage. Shorter ratios provide quicker acceleration‚ while taller ratios enhance fuel efficiency at highway speeds. Thorough research is crucial to ensure the chosen transmission aligns with your performance goals and doesn’t create unforeseen issues like driveshaft angle problems or ECU incompatibility. Careful consideration of these factors prevents costly mistakes.
Clutch Kit Selection: Disc‚ Pressure Plate‚ and Throwout Bearing
The clutch kit is the heart of the manual conversion‚ demanding careful selection based on engine power and intended use. The disc’s friction material must withstand the engine’s torque output; organic options suit mild builds‚ while ceramic or metallic discs are necessary for high-horsepower applications. The pressure plate dictates clamping force‚ influencing pedal effort and engagement point.
A robust pressure plate is vital for preventing slippage under load. Don’t overlook the throwout bearing (release bearing)‚ as it experiences significant wear during gear changes. Opt for a high-quality bearing to avoid premature failure. Matching the kit’s components ensures optimal performance and longevity‚ preventing issues like chatter or incomplete disengagement.
Flywheel Considerations: Weight and Material
The flywheel plays a crucial role in smoothing engine operation and providing a surface for clutch engagement. When converting from automatic‚ you’ll likely need a new flywheel designed for a manual transmission. Flywheel weight significantly impacts engine responsiveness; lighter flywheels allow for quicker revving but can make the engine stall more easily.
Heavier flywheels offer better low-end torque and smoother operation‚ ideal for street driving. Material choices include steel and aluminum. Steel flywheels are durable and cost-effective‚ while aluminum flywheels reduce rotational mass‚ enhancing acceleration. Ensure the flywheel is balanced to prevent vibrations. Compatibility with the chosen clutch kit is paramount for proper function and preventing premature wear.
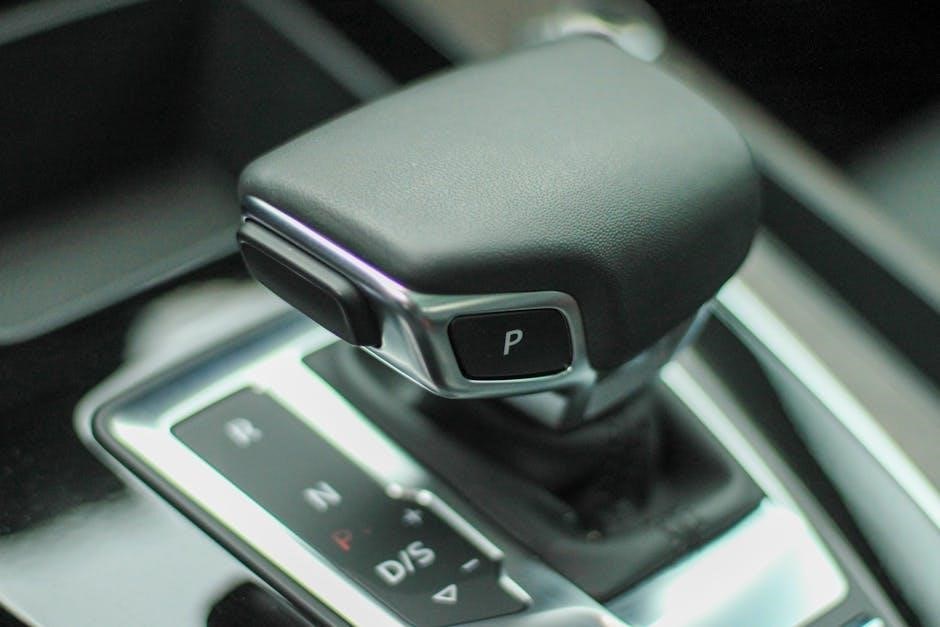
Gear Shifter and Linkage Systems
Selecting the correct gear shifter and linkage is vital for a precise and enjoyable driving experience. Conversion kits often include a shifter assembly‚ but compatibility with the transmission and vehicle interior is key. Linkage systems connect the shifter to the transmission‚ translating driver input into gear changes.
Options range from cable-operated to direct-linkage systems. Cable systems offer flexibility in shifter placement‚ while direct linkage provides a more direct feel. Proper adjustment of the linkage is crucial to avoid binding or imprecise shifts. Consider the shifter’s throw length and feel to match your driving preferences. Ensure all components are robust enough to withstand repeated use.
Pedal Assembly: Clutch and Brake Pedal Requirements
Converting from automatic necessitates installing a clutch pedal assembly‚ as automatics lack this crucial component. Most conversion kits do not include pedals‚ requiring sourcing from a donor vehicle or purchasing aftermarket options. Compatibility with your specific vehicle model is paramount.
Brake pedal modifications may also be needed to ensure proper positioning and feel alongside the new clutch pedal. Careful consideration must be given to pedal box clearance and ergonomics. Ensure sufficient space for comfortable operation and avoid interference with other interior components. Proper mounting and reinforcement are essential for safety and durability.
Wiring Harness Modifications and ECU Considerations
The Engine Control Unit (ECU) requires attention during an automatic to manual conversion. Automatic transmissions send signals to the ECU; these must be removed or altered to prevent error codes and ensure proper engine operation. ECU remapping or tuning is often necessary to optimize performance for the manual transmission and remove automatic transmission-related functions.
Wiring harness modifications are frequently required to accommodate the clutch switch‚ which signals the ECU when the clutch is disengaged. This is vital for starting the engine and potentially for other functions. Incorrect wiring can lead to starting issues or engine mismanagement. Professional tuning is highly recommended for optimal results.
Installation Process: A Step-by-Step Overview
The conversion involves removing the automatic transmission‚ installing the manual‚ clutch adjustments‚ shifter linkage connection‚ and pedal assembly fitting.
Removing the Automatic Transmission
Begin by safely lifting and securing the vehicle using jack stands. Disconnect the driveshaft‚ ensuring you mark the orientation for reinstallation. Detach all wiring and linkages connected to the automatic transmission‚ carefully labeling each component to simplify reassembly later.
Support the engine from above with an engine support bar to prevent it from tilting when the transmission is removed. Remove the exhaust system components that obstruct access to the transmission. Next‚ unbolt the transmission mount and carefully lower the transmission using a transmission jack.
Be prepared for the weight and ensure the jack is rated appropriately. Once lowered‚ completely disconnect the transmission from the engine‚ taking note of the flexplate and torque converter. Thoroughly inspect the flexplate for any signs of wear or damage before proceeding.
Installing the Manual Transmission
Carefully position the manual transmission using a transmission jack‚ aligning it with the engine. Gently guide the input shaft into the clutch disc‚ ensuring proper engagement – a slight rotation of the crankshaft may help. Securely bolt the transmission to the engine‚ following the manufacturer’s torque specifications.
Reinstall the transmission mount and ensure it’s properly tightened. Reconnect the driveshaft‚ verifying the marked orientation from removal. Begin reattaching all previously disconnected wiring and linkages‚ referencing your labels for accuracy.
Double-check all connections before lowering the vehicle. Confirm the transmission is fully supported and all bolts are tightened to prevent damage or movement during initial operation. This step is crucial for a successful conversion.
Clutch Installation and Adjustment
Begin by carefully installing the clutch disc‚ ensuring it’s oriented correctly within the flywheel. Next‚ mount the pressure plate‚ aligning it with the dowel pins and tightening the bolts in a star pattern to the specified torque. Install the throwout bearing onto the release fork‚ lubricating the contact points.
Proper clutch adjustment is vital for smooth operation. Adjust the clutch cable or hydraulic system to achieve the correct pedal free play‚ typically around 0.5-1 inch. Insufficient free play can cause slippage‚ while excessive play can lead to difficulty shifting.
Test the clutch engagement before fully reassembling the drivetrain‚ ensuring it disengages completely when the pedal is pressed.
Connecting the Shifter Linkage
Attaching the shifter linkage is a crucial step‚ demanding precision for accurate gear selection. Begin by installing the shift lever and ensuring it moves freely through all gear positions. Connect the linkage rods‚ carefully adjusting their lengths to eliminate binding and achieve proper gate alignment.
Verify that each gear engages smoothly and positively‚ without any looseness or resistance. Incorrect linkage adjustment can result in missed shifts or difficulty selecting certain gears. Utilize the adjustment points on the linkage to fine-tune the shifter’s feel and precision.
Double-check all connections and secure fasteners to prevent disengagement during operation.
Pedal Installation and Adjustment
Installing the clutch and brake pedals is fundamental‚ often requiring sourcing used components if not included in the conversion kit. Securely mount the pedal assembly‚ ensuring proper placement for comfortable and safe operation. Connect the clutch master cylinder to the pedal‚ bleeding the system to remove any air bubbles.
Adjust the pedal height and travel to suit your driving preference‚ ensuring full engagement and disengagement of the clutch. Verify the brake pedal functionality and adjust as needed. Proper pedal positioning is vital for smooth shifting and effective braking.
Confirm secure mounting and test pedal operation thoroughly before proceeding.

Sourcing Parts and Kits
Finding the right conversion kit and components is crucial; reputable manufacturers like SBR Engineering are well-known‚ alongside online forums for used parts.
Reputable Conversion Kit Manufacturers (SBR Engineering)
SBR Engineering has established itself as a globally recognized leader in manual transmission conversion kits‚ particularly for high-performance vehicles like Ferraris and Lamborghinis. Their expertise extends to specialist sports cars‚ offering meticulously engineered solutions for those seeking a more engaging driving experience.
Choosing a reputable manufacturer like SBR Engineering ensures quality components and detailed instructions‚ minimizing potential complications during the conversion process. They focus on providing complete kits‚ though some components‚ such as the clutch and brake pedals‚ may need to be sourced separately‚ often from used parts markets.
Their kits are designed to integrate seamlessly with the vehicle’s existing systems‚ offering a reliable and durable upgrade. Investing in a well-regarded brand can save significant time and frustration compared to piecing together a conversion from disparate sources.
Finding Used Parts: Pedals and Other Components
Sourcing used parts‚ particularly clutch and brake pedals‚ can significantly reduce the overall cost of an automatic to manual conversion. However‚ it requires diligent searching and careful inspection. Online marketplaces and automotive forums are excellent resources for locating these components‚ often from vehicles being parted out.
When acquiring used pedals‚ verify their compatibility with your specific vehicle model and year. Ensure they are in good working condition‚ free from excessive wear or damage. Other components‚ like shifter linkages‚ might also be found used‚ but condition is paramount.
Be prepared to spend time searching and potentially negotiating prices. Thoroughly examine photos and‚ if possible‚ inspect the parts in person before purchasing to avoid costly mistakes.
Online Forums and Communities for Support
Undertaking an automatic to manual conversion can be complex‚ making online forums and communities invaluable resources. These platforms connect you with experienced enthusiasts who have completed similar projects‚ offering guidance and troubleshooting assistance.
Dedicated forums often host detailed build threads‚ providing step-by-step instructions and insights into potential challenges. Members readily share their knowledge regarding parts compatibility‚ installation techniques‚ and ECU tuning.
Active communities can also help you locate hard-to-find parts or offer advice on sourcing affordable options. Don’t hesitate to ask questions and engage with fellow enthusiasts – their collective experience can save you time‚ money‚ and frustration throughout the conversion process;
Potential Challenges and Solutions
Conversion hurdles include ECU remapping‚ driveshaft modifications‚ and compatibility issues‚ particularly with models like the 8th Gen Civic‚ demanding careful planning.
ECU Remapping and Tuning
Converting from automatic to manual necessitates ECU adjustments‚ as the engine control unit is initially programmed for automatic transmission parameters. Removing torque converter feedback and adapting to manual gear selection requires a custom tune. This remapping ensures optimal engine performance‚ prevents error codes‚ and allows for proper fuel delivery and ignition timing.
Without proper tuning‚ you might experience issues like incorrect speed sensor readings‚ suboptimal power delivery‚ or even engine damage. Several options exist‚ including sending your ECU to a specialist tuner or utilizing a programmable aftermarket ECU. The complexity of the tuning process depends on the vehicle’s make and model‚ and the sophistication of its existing ECU. Accurate tuning is crucial for a smooth and reliable driving experience post-conversion.
Driveshaft Modifications
A crucial aspect often overlooked is driveshaft compatibility‚ as manual and automatic transmissions frequently utilize different output shaft lengths and splines. Direct fitment is rare‚ often requiring a driveshaft modification or complete replacement. This ensures proper alignment and prevents vibrations.
The need for modification depends on the specific vehicles‚ and the chosen manual transmission. Shortening or lengthening the driveshaft may be necessary‚ alongside adapting the U-joints or slip yoke. Ignoring this step can lead to premature wear on drivetrain components and a compromised driving experience. Professional driveshaft service is highly recommended to guarantee accurate measurements and balanced assembly‚ ensuring long-term reliability and safety.
Compatibility Issues with Specific Vehicle Models (8th Gen Civic)
The 8th generation Honda Civic presents unique challenges during an automatic to manual conversion. Owners frequently inquire about the feasibility‚ noting potential hurdles beyond standard swaps. Specifically‚ ensuring ECU compatibility and proper function of all systems requires careful attention.

Finding a complete‚ direct-fit kit can be difficult‚ often necessitating sourcing individual components. Pedal assemblies and shifter linkages may require fabrication or adaptation. Furthermore‚ the ECU may need remapping to accommodate the manual transmission‚ resolving potential error codes and optimizing performance. Thorough research within 8th Gen Civic forums is vital‚ as experienced enthusiasts share valuable insights and solutions to common compatibility issues encountered during this conversion process.
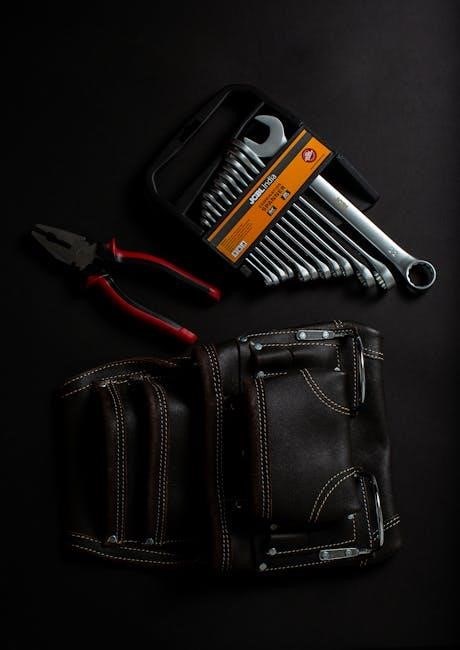
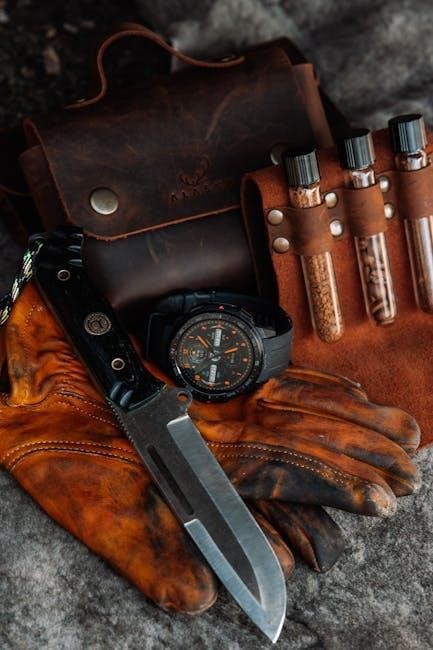
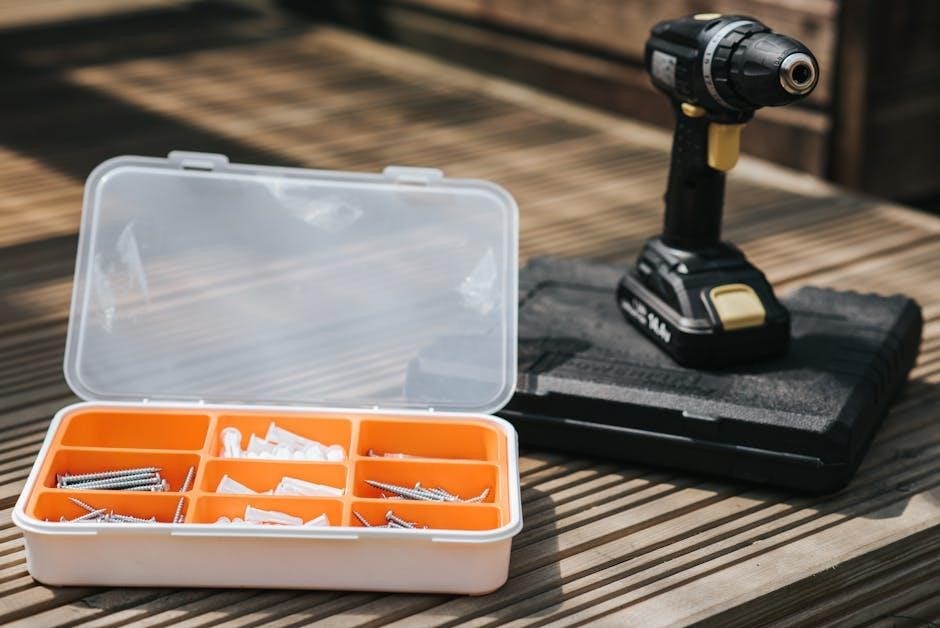
Tools Required for the Conversion
Successful conversion demands essential hand tools‚ alongside specialized equipment like a transmission jack and flywheel holder for safe and efficient component handling.
Essential Hand Tools
A comprehensive set of hand tools is fundamental for a successful automatic to manual conversion. This includes a variety of socket wrenches (metric and standard)‚ extensions‚ and ratchets to tackle various bolts and fasteners encountered during disassembly and reassembly. Open-end and box-end wrenches are also crucial for reaching tight spaces.
Torque wrenches are absolutely essential to ensure proper tightening of critical components like the flywheel and transmission mounting bolts‚ preventing damage or failure. Screwdrivers (Phillips and flathead) in multiple sizes will be needed for interior work and smaller fasteners. Pliers‚ including needle-nose and locking pliers‚ are invaluable for manipulating hoses and cables.
Don’t forget a hammer (rubber mallet and ball-peen hammer) for gentle persuasion and more forceful tasks. A breaker bar will assist in loosening stubborn bolts. Finally‚ having a good set of hex keys (Allen wrenches) is vital for various components. Safety glasses and gloves are non-negotiable for personal protection throughout the process.
Specialized Tools: Transmission Jack‚ Flywheel Holder
Beyond standard hand tools‚ specific equipment dramatically simplifies the automatic to manual conversion. A transmission jack is paramount; attempting to maneuver a heavy transmission without one is incredibly dangerous and difficult. This jack provides controlled lowering and raising‚ ensuring safe positioning for installation and removal.
A flywheel holder is equally critical. This tool securely locks the flywheel in place while you torque the clutch bolts to the manufacturer’s specifications. Without it‚ the flywheel will rotate‚ making accurate tightening impossible and potentially damaging the threads.
Consider a pilot shaft alignment tool to ensure perfect alignment between the clutch disc and the transmission input shaft‚ preventing damage during mating. Additionally‚ a set of impact sockets can be incredibly helpful for stubborn fasteners. These specialized tools represent a worthwhile investment for a smooth and safe conversion.
Post-Conversion Considerations
After the swap‚ a clutch break-in period is crucial‚ alongside fluid checks and changes. Mastering manual driving techniques ensures optimal performance and longevity.
Break-in Period for Clutch
The initial 500-1000 miles following a clutch installation are critical for proper bedding-in. Avoid aggressive driving‚ including hard launches‚ high-RPM shifts‚ and prolonged clutch slippage during this period. Gentle engagement and disengagement of the clutch are key to transferring heat evenly across the friction material.
This process allows the clutch disc and pressure plate to mate correctly‚ maximizing lifespan and preventing premature wear or glazing. Frequent‚ moderate stops and starts are preferable to long highway drives without clutch engagement. Ignoring the break-in procedure can lead to reduced clutch performance‚ shuddering‚ and ultimately‚ the need for premature replacement. Patience during this phase will yield significant long-term benefits.
Fluid Changes and Maintenance
Post-conversion‚ immediate attention to fluid levels is paramount. The manual transmission requires a specific gear oil type – consult your transmission manufacturer’s recommendations for viscosity and specifications. A complete flush and fill are essential to ensure optimal lubrication and prevent premature wear of gears and bearings.
Additionally‚ the hydraulic clutch system needs inspection and bleeding to eliminate air bubbles‚ guaranteeing smooth and consistent clutch engagement. Regularly check the brake fluid level as it often shares a reservoir with the clutch system. Routine maintenance‚ including fluid changes every 30‚000-60‚000 miles‚ will preserve the longevity and performance of your newly converted manual transmission.
Driving Techniques for Manual Transmissions
Transitioning from automatic to manual demands a shift in driving habits. Mastering smooth clutch engagement and coordinated throttle control is crucial to avoid stalling or jerky starts. Practice finding the “friction point” – the sweet spot where the clutch begins to transmit power.
Heel-toe downshifting‚ while advanced‚ enhances smooth gear changes during deceleration. Anticipate stops and downshift proactively to maintain control and engine braking. Avoid “riding the clutch‚” which causes premature wear. Embrace rev-matching for seamless transitions and a more engaging driving experience. Patience and practice are key to becoming proficient with a manual transmission.
