Masterbuilt Propane Smoker Instructions: A Comprehensive Guide
Welcome! This guide provides detailed instructions for assembling, operating, and maintaining your Masterbuilt propane smoker, ensuring delicious results every time.
Understanding Your Masterbuilt Propane Smoker
Masterbuilt propane smokers offer a convenient way to enjoy authentic smoked flavors. These smokers are specifically designed for propane gas, not natural gas, ensuring optimal performance and safety. Familiarize yourself with the unit’s components and operation before first use.
This guide covers various models, including the XL Propane Smoker and ThermoTemp XL versions. Proper understanding of your smoker’s features, like the burner assembly and grease management, is crucial for successful smoking and long-term enjoyment. Always refer to your specific model’s manual for detailed diagrams.
Unboxing and Assembly
Carefully unpack your Masterbuilt propane smoker, verifying all components are present against the parts list in your manual. Assembly typically involves attaching legs, wheels, and the grease tray. Ensure all screws are tightened securely, but avoid over-tightening.
Refer to the detailed assembly diagrams provided in the manual for step-by-step guidance. Proper assembly is vital for safe and efficient operation. Take your time and double-check connections before proceeding to the next step. A correctly assembled smoker will deliver years of reliable service.
Identifying Key Components
Your Masterbuilt propane smoker features several crucial components. These include the burner assembly, responsible for generating heat, and the grease management system, vital for easy cleanup. Familiarize yourself with the temperature control and venting mechanisms for precise cooking.

Locate the wood chip box, where you’ll add wood for smoke flavor. Understanding each component’s function is essential for successful smoking. Refer to the diagrams in your manual to pinpoint each part and its role in the overall cooking process.

Burner Assembly
The burner assembly is the heart of your Masterbuilt propane smoker, converting propane gas into heat. It consists of the burner itself, a gas valve for control, and connecting tubes. Visually inspect the burner for any obstructions before each use.
Ensure the gas valve operates smoothly, allowing for precise temperature adjustments. A clean and functioning burner is crucial for consistent and efficient smoking. Regularly check connections for leaks, prioritizing safety during operation.
Grease Management System
Your Masterbuilt propane smoker features a crucial grease management system designed to collect drippings and prevent flare-ups. This typically includes a grease trap or pan located beneath the cooking area. Regularly emptying and cleaning this component is vital for both safety and optimal performance.

A full grease trap can cause smoking issues and potential fires. Consistent maintenance ensures a cleaner cooking environment and prevents unwanted flavors from impacting your food. Always dispose of collected grease responsibly.
Temperature Control & Venting
Precise temperature control is key to successful smoking. Your Masterbuilt propane smoker utilizes burner adjustments and venting to regulate heat. The burner valve controls gas flow, directly impacting temperature. Adjusting the vent allows for airflow regulation, influencing smoke circulation and heat retention.

Experiment with these controls to achieve desired cooking temperatures. Proper venting also prevents excessive smoke buildup. Monitoring the smoker’s built-in thermometer is crucial for consistent results.
Initial Setup & Safety Checks
Before your first cook, thorough setup and safety checks are vital. Ensure the smoker is on a level, stable surface away from flammable materials. Carefully inspect all connections for damage. Propane tank connection must be secure, and the regulator properly attached.
Critically, perform a leak test using soapy water on all gas connections – bubbles indicate a leak. Always operate the smoker in a well-ventilated area, and never leave it unattended.
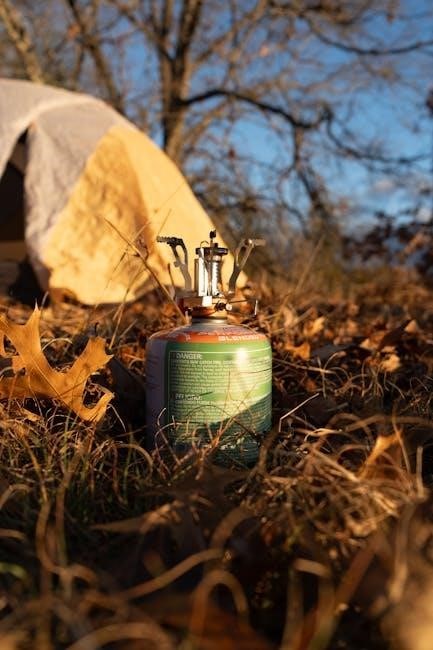
Propane Tank Connection
Connect a propane tank specifically marked for propane use to the regulator assembly. Ensure a tight, secure connection by hand – do not use tools. The regulator is designed for propane and won’t function with natural gas. Verify the tank valve is fully closed before connecting.
Inspect the hose for cracks or damage before each use. A properly connected tank is crucial for safe and efficient operation of your Masterbuilt smoker.
Leak Testing with Soapy Water
After connecting the propane tank, perform a leak test for safety. Mix water with a mild dish soap and apply the solution to the hose connections and regulator.
Open the propane tank valve slightly. If bubbles form, a leak exists. Immediately close the valve and retighten the connections. Repeat the test until no bubbles appear, ensuring a secure and safe connection before operating the smoker.
Ignition Instructions
Before attempting ignition, ensure the lid is open and the burner is turned off. Visually inspect the burner for any obstructions. Follow the specific procedure for your model – either manual or electronic ignition.
Always keep a safe distance during ignition. If the burner doesn’t light immediately, turn off the gas and allow it to dissipate before attempting again. Refer to your model’s specific manual for detailed steps.
Manual Ignition Procedure
For manual ignition, locate the igniter port near the burner. Turn the burner control knob to the “High” position. Simultaneously, press and hold the igniter button – you should hear a clicking sound. Continue holding the igniter button while observing the burner for ignition.
If the burner doesn’t ignite within a few seconds, release the igniter and allow any accumulated gas to clear before repeating the process. Exercise caution during this step.
Electronic Ignition Procedure (if applicable)
If your Masterbuilt propane smoker features electronic ignition, simply turn the burner control knob to the “High” position. The igniter should automatically spark, initiating the gas flow and igniting the burner. Listen for a consistent burning sound.
If ignition doesn’t occur, check the battery powering the igniter. A weak battery can prevent successful ignition. Replace the battery if necessary and retry the process.
First-Time Burn-In
Before your first cook, perform a burn-in to eliminate any manufacturing residues. Light the smoker and set the burner to medium-high heat for approximately 2-3 hours. This process will burn off any oils or coatings used during manufacturing.
Ensure adequate ventilation during the burn-in. A slight odor is normal during this initial process. This burn-in prepares the smoker for optimal performance and ensures a clean cooking environment for your food.
Temperature Control & Smoke Generation
Precise temperature control is vital for successful smoking. Adjust the burner settings using the control knob to achieve your desired cooking temperature. Regularly monitor the smoker’s thermometer for accuracy.
For smoke generation, fill the wood chip box with your preferred wood chips. The heat from the burner will smolder the chips, creating flavorful smoke. Replenish wood chips as needed to maintain consistent smoke production throughout the cooking process.

Adjusting Burner Settings
To adjust the burner, rotate the control knob; clockwise increases heat, counterclockwise decreases it. Start with a lower setting and gradually increase until the desired temperature is reached. Monitor the smoker’s thermometer closely during adjustments.
Remember that external factors like wind can affect temperature. You may need to fine-tune the burner setting to compensate. Consistent monitoring and small adjustments are key to maintaining a stable cooking temperature.
Wood Chip Box Management
Proper wood chip management is crucial for smoke flavor. Soak wood chips in water for at least 30 minutes before use, but don’t saturate them. Fill the wood chip box, ensuring chips don’t obstruct airflow.
Replenish wood chips as needed, typically every 45-60 minutes, to maintain consistent smoke. Experiment with different wood types – hickory, mesquite, apple – to discover your preferred flavors. Avoid overfilling, which can smother the chips.
Cooking with Your Masterbuilt Propane Smoker
Your Masterbuilt propane smoker excels at low and slow cooking. Recommended temperatures range from 225°F to 275°F for most meats. Utilize a meat probe to monitor internal temperatures accurately, ensuring food safety and optimal tenderness.
Position food away from the direct heat source. Remember, cooking times vary based on meat type, thickness, and desired doneness. Consistent temperature control is key for exceptional smoked results.
Recommended Cooking Temperatures
For ribs, maintain a temperature between 225°F and 250°F for 5-7 hours. Brisket benefits from 225°F to 275°F, typically requiring 12-18 hours. Poultry thrives at 275°F to 300°F, cooking for approximately 6-8 hours.
Pork shoulder is best at 225°F-250°F for 8-12 hours. These are guidelines; always use a meat thermometer to verify internal temperatures for safe and delicious results!
Meat Probe Usage

Utilize the meat probe to accurately monitor internal meat temperatures during cooking. Insert the probe into the thickest part of the meat, avoiding bone. Connect the probe to the smoker’s digital controller for continuous temperature readings.
Set your desired final temperature on the controller, and the smoker will adjust to maintain it. Regularly check the probe placement to ensure accurate readings and achieve perfectly cooked results every time!
Cleaning and Maintenance
Regular cleaning extends your Masterbuilt smoker’s lifespan and ensures optimal performance. After each use, allow the smoker to cool completely before cleaning. Remove and empty the grease trap, washing it with warm, soapy water. Inspect the burner for debris and clean as needed.
Periodically, wipe down the smoker’s interior and exterior surfaces. Proper maintenance prevents flare-ups and maintains consistent temperatures for years of enjoyable smoking!
Grease Trap Cleaning
Consistent grease trap cleaning is crucial for preventing fires and maintaining smoker performance. After each cook, once the smoker has cooled, carefully remove the grease trap. Dispose of collected grease responsibly – never pour it down the drain!
Wash the trap thoroughly with warm, soapy water, ensuring all residue is removed. A clean grease trap promotes safe operation and prevents unwanted flavors from impacting your food.
Burner Cleaning
Regular burner cleaning ensures efficient propane flow and consistent temperatures. Before cleaning, always disconnect the propane tank! Use a wire brush to gently remove any debris or buildup from the burner ports. A clogged burner can lead to uneven heating and reduced smoking performance.
Inspect the burner for damage and replace if necessary. Reconnect the propane tank securely after cleaning, and perform a leak test before use.
Troubleshooting Common Issues
Temperature fluctuations can occur due to wind or inconsistent propane supply; shield the smoker and check the tank. Ignition problems often stem from a dirty burner or low propane; clean the burner and ensure sufficient fuel.
If issues persist, verify proper propane tank connection and perform a leak test. Consult the full manual for detailed diagnostics and contact Masterbuilt support if needed.
Temperature Fluctuations
Temperature instability is often caused by external factors like wind or ambient temperature changes. Shielding your smoker from wind can significantly improve consistency. Ensure a consistent propane supply; a low tank will cause fluctuations.
Check vent settings and adjust accordingly. Regularly monitor the internal temperature with a reliable thermometer. Minor variations are normal, but large swings require investigation.
Ignition Problems
Difficulty igniting often stems from a blocked burner or insufficient propane flow. Visually inspect the burner for obstructions and clean if necessary. Confirm the propane tank is full and the valve is fully open.
For electronic ignition, check the battery. If using manual ignition, ensure a strong spark. A soapy water test can reveal gas leaks preventing proper ignition.
Safety Precautions
Prioritize safety! Always operate your Masterbuilt propane smoker outdoors, away from flammable materials. Ensure adequate ventilation to prevent carbon monoxide buildup. Never leave a lit smoker unattended.
Inspect the gas hose for damage before each use. Keep children and pets at a safe distance. Store propane tanks upright and away from heat sources. Follow all warnings in this manual diligently.
Propane Gas Safety
Crucially, your Masterbuilt propane smoker is designed solely for propane gas. Never attempt to use natural gas. Always check for leaks using soapy water before ignition – bubbles indicate a problem. Store propane cylinders upright, in a well-ventilated area, away from heat and ignition sources.
Ensure the gas supply is turned off when not in use. If you smell gas, immediately shut off the gas supply and do not attempt to light the smoker.
Smoker Placement & Ventilation
Proper placement is vital for safe operation. Position your Masterbuilt propane smoker outdoors, away from flammable materials, buildings, and overhanging structures. Maintain a minimum of 10 feet clearance on all sides.
Ensure adequate ventilation to prevent carbon monoxide buildup. Never operate the smoker in a closed garage or enclosed space. A well-ventilated outdoor area is essential for safe and effective smoking.
Masterbuilt Propane Smoker Model Variations
Masterbuilt offers a diverse range of propane smoker models, including the 30-inch Analog and Digital models, as well as the XL 40-inch ThermoTemp. Variations exist in size, features, and burner configurations.
Specific models like the MB20051311 (Two Door 30-inch) and MB20051316 (40-inch ThermoTemp XL) may have slightly different control panels or internal layouts. Always refer to the manual specific to your model for accurate instructions.
Resources & Support
Masterbuilt provides extensive resources for propane smoker owners. Access downloadable manuals in PDF format for all models on their official website. Replacement parts are readily available for purchase, ensuring longevity of your smoker.
For troubleshooting assistance or specific questions, contact Masterbuilt’s customer support team. Online forums and communities dedicated to Masterbuilt products also offer valuable tips and shared experiences from fellow smoker enthusiasts.
